Best Patch Materials for DIY Projects

For DIY projects, choosing patch materials can make or break your repair efforts. If you are creating your own patch, the material still plays a key role. Consider fabric patches for clothing, especially iron-on types that require no sewing. Understanding these materials guarantees successful repairs, guiding you to further practical insights.

List of Best Patch Materials for DIY EMB Projects

Cotton: fabric offers a versatile and aesthetically pleasing solution for many DIY projects, ranging from clothing repairs to decorative applications. It is a sewing-friendly commercial embroidery machine.

Polyester: is super resistant to fading. this feature makes polyester top choice items subjected to frequent wear like clothing patches.

Denim: really stands out as a versatile choice. They come in various colors and styles, allowing you to customize your clothing to match your personal flair.

Canvas: is a great choice material for everyday wear patches, but the thickness of canvas fabric varies according to personalization needs.

Silk is a delicate fabric and another great fabric type as a DIY project material. Silk can add a touch of elegance.

Adhesive kits: come with self-adhesive backing that bonds securely to a wide range of surfaces, including a vast range of fabric types and custom patches.

Vinyl: can revamp your favorite bag and accessories. It can revalue furniture to its original charm. 

Leather: is the best use case for regular jackets and leather-made jackets. With vast functionality under clothing items, it shares big margins for DIY projects.

Best Materials and Patches – Head-to-Head

Patches made of cotton twill not only extend the life of beloved garments but also provide a creative outlet for personal expression. Among the most popular types are iron-on patches, which simplify the application process considerably. By using heat and pressure, these patches adhere securely to fabric surfaces, eliminating the need for sewing skills and ensuring a polished finish. This ease of use makes them particularly attractive to beginners and those seeking quick solutions.

Decorative patches, on the other hand, serve as an artistic medium to personalize clothing and accessories. With countless designs available—from vintage motifs to contemporary art—these patches allow individuals to showcase their unique style effortlessly. It’s important to select quality fabric patches that complement the material of the item being adorned, ensuring durability and a cohesive appearance.


How to Create Your Own Patches With DIY Kits

Creating your own patches with DIY kits requires a strategic approach. Start by selecting a kit that includes durable fabric, like cotton, and offers customization options such as varied thread colors and embellishments. Confirm your workspace is well-lit and organized with essential tools like fabric scissors and a cutting mat for precision. Then, focus on transferring your design onto the fabric, using techniques such as the backstitch or satin stitch for detailing. After completing the embroidery, choose your attachment method; heat-activated adhesives or sewing offer varying degrees of permanence. With these steps, you’ll create professional and personalized patches. Continue onward for further insights. Here are 5 prerequisites to get started.

1 – Fabric Selection

Evaluate fabric types in DIY kits, considering durability and application ease, to ensure a suitable base for your patch.

2 – Patch Sizing

Select patch dimensions that fit your design and intended application area for optimal results.

3 – Adding Personalization

Customize your patch using kits that offer various threads and embellishments for personal touches.

4 – Preparing Material

Prepare your workspace with the necessary materials and tools, ensuring a distraction-free, well-lit environment for patch creation.

5 – Stitching Technique

Use appropriate stitching techniques to secure your patch, offering durability and a polished finish.

Choosing the Right DIY Kit

Selecting the appropriate DIY kit is a vital first step in guaranteeing the success of your patch-making project. The right kit features can notably impact your creative journey, making it essential to understand the various elements involved. When evaluating fabric types, consider durability and ease of application. Common options include cotton and polyester, each offering unique benefits and requiring different handling techniques. Patch sizes vary widely, so choose dimensions that align with your intended design and application area.

Customization options are another important factor. Kits that allow for personalization can enhance your creative expression. Some offer a range of threads and embellishments, enabling you to tailor patches to your specific taste. Budget considerations cannot be overlooked, as kits range from basic to premium. Evaluate your financial plan to find a kit that offers value without compromising quality.

Reading user reviews provides insight into real-world experiences, highlighting potential challenges and advantages. Brand comparisons are useful for identifying reputable manufacturers, assuring you invest in a product that matches your skill levels. For beginners, consider kits that provide thorough instructions and are designed to ease you into the art of patch-making. Choose wisely to guarantee a rewarding patch-making experience.

Gathering Necessary Materials

Having chosen the ideal DIY kit, the next step in your patch-making journey involves assembling the necessary materials to bring your creative vision to life. The importance of selecting the right materials cannot be overstated, as each component plays a critical role in ensuring the durability and aesthetic appeal of your patch. It is essential to evaluate both patch material selection and patch size considerations when gathering materials, as these factors will greatly influence your patch’s final appearance and functionality.

To streamline this process, here is a list of essential items you will need:

  1. Fabric Base: Choose a durable fabric such as cotton or polyester that aligns with your patch size considerations. The fabric should be sturdy enough to withstand regular wear and tear.
  2. Embroidery Thread: This is used to detail your design. Select threads in colors that complement your chosen fabric and design.
  3. Backing Material: Examine options like iron-on adhesive or sew-on backing, depending on your intended use for the patch.
  4. Cutting Tools: Precision cutting tools, such as fabric scissors or rotary cutters, are necessary to achieve clean edges and accurate shapes according to your patch size specifications.

Ensuring you have these materials will set a solid foundation for your patch-making project.

Exploring Design Options

When starting on the creative phase of patch-making, exploring design options becomes an enchanting venture that allows for personal expression and innovative artistry. This stage is essential, offering a canvas for your creativity to flourish. Design inspiration can stem from various sources, such as nature, popular culture, or personal experiences. It is important to allow your imagination to roam freely, while also reflecting on practical aspects like size and complexity, ensuring the design is feasible for a patch.

Color selection is a fundamental component of this process. The hues you choose will influence the patch’s impact and emotional resonance. Vibrant colors can convey energy and excitement, whereas muted tones might evoke a sense of calm or nostalgia. It is significant to contemplate how different colors interact, ensuring they complement each other and enhance the overall design. Additionally, think about the base fabric color, as it will affect the visibility and vibrancy of the chosen palette.

Incorporating these elements thoughtfully can transform an ordinary patch into a unique piece of art. By understanding the interplay between design inspiration and color selection, you can craft patches that truly reflect your creative vision.

Preparing Your Workspace

Creating an efficient workspace is essential for the seamless execution of your patch-making project. Proper workspace organization and lighting considerations are critical components that can greatly influence the quality of your work. Begin by selecting a dedicated area that is free from distractions and offers ample space for all necessary materials and tools. This thoughtful arrangement will facilitate a productive environment, allowing you to focus entirely on the creative process.

To prepare your workspace effectively, consider the following recommendations:

  1. Space Allocation: Make sure that your workspace is large enough to accommodate your DIY kit, fabric, cutting tools, and other accessories. A clutter-free environment enhances focus and efficiency.
  2. Lighting Considerations: Ideal lighting is key. Utilize natural light wherever possible, or install a bright, adjustable lamp to minimize shadows and reduce eye strain during detailed tasks.
  3. Tool Accessibility: Arrange your tools and materials within arm’s reach. This organization prevents unnecessary interruptions and maintains the momentum of your work.
  4. Surface Protection: Protect your work surface with a cutting mat or similar protective layer. This not only preserves the integrity of your workspace but also enhances precision in cutting and assembling your patches.

Implementing these strategies will guarantee a smooth and successful patch-making experience.

Techniques for Embroidery

Embroidery techniques form the backbone of any successful DIY patch project, transforming a simple piece of fabric into a detailed work of art. Mastering these techniques requires an understanding of various stitch styles and fabric types, each contributing to the distinct texture and appearance of your patch. Selecting the right stitch style is vital; it determines the patch’s durability and aesthetic appeal. Here are four essential techniques to take into account:

  1. Backstitch: Ideal for outlining and lettering, the backstitch provides a strong, clean line that enhances detail. Suitable for most fabric types, it guarantees a neat finish.
  2. Satin Stitch: Perfect for filling areas with a smooth, satin-like appearance. This stitching style works best with tightly woven fabrics, offering a polished and professional look.
  3. Chain Stitch: Known for its decorative flair, the chain stitch adds texture and depth. It is versatile across different fabric types, allowing for creative expression.
  4. French Knot: A charming addition, the French knot adds dimension and intricacy. Best for embellishing, it complements various fabrics with its three-dimensional effect.

Understanding these techniques will elevate your embroidery skills, guaranteeing that your DIY patches are both visually stunning and structurally sound.

Step-by-Step Patch Creation

  1. To commence the step-by-step patch creation process, start by selecting your desired fabric, making certain it is both durable and suitable for the intended application. Cotton or denim often serve as excellent choices due to their robustness. Once you have your fabric, gather your patch ideas and design inspiration. This step is essential, as it sets the foundation for your creative endeavor.
  2. Draw or print your chosen design onto paper, keeping in mind the size and complexity appropriate for your skill level. Transfer this design carefully onto the fabric using a fabric pencil or tailor’s chalk, guaranteeing clarity and accuracy. This outline will guide your next steps and prevent errors.
  3. Next, cut out the fabric patch, leaving a small margin around the design to accommodate any stitching or finishing techniques. As you proceed, consider the colors and threads that will best bring your design to life. Select threads that complement the design and fabric, balancing aesthetics and functionality.
  4. Finally, secure the fabric in an embroidery hoop to maintain tension and prevent unwanted movement during stitching. This setup is pivotal to achieving a polished final product, as it guarantees precision and consistency throughout the creation process.

Applying Your Finished Patch

Once you have meticulously crafted your DIY patch, the next critical step is applying it to your chosen surface, guaranteeing both adherence and alignment are flawless. Proper patch placement is paramount, as a misaligned patch can detract from the overall aesthetic and undermine the effort invested in its creation. Begin by identifying the ideal location for your patch on the garment or item, considering visibility and symmetry. Temporarily secure the patch with pins to verify its position before committing to a permanent bond.

When it comes to adhesive options, several methods can be employed, each with its own merits. Heat-activated adhesives, such as iron-on backing, offer a convenient solution for fabrics that can withstand high temperatures. Carefully follow the manufacturer’s instructions to avoid damaging the material. Alternatively, fabric glue provides a versatile option for items unsuitable for ironing but requires adequate drying time to guarantee a strong bond.

Sewing the patch is another reliable method, offering durability and a polished finish. Utilize a needle and thread that matches the patch’s border for a seamless appearance. Regardless of the method chosen, guarantee that the patch is securely affixed to withstand washing and regular wear.

How to Choose Right Embroidery Style for Name Tag Patches

Choosing the right embroidery style for name tag patches involves carefully balancing durability and functionality. Here are 5 elements with key takeaways to understand the right embroidery style for name tag patches.

Machine embroidery: offers precise and consistent results, with diverse thread options ideal for professional settings requiring uniformity.

Hand embroidery: provides an artisanal touch, though it might include subtle variations.

Fabric & Threads: are essential; high-quality polyester threads guarantee longevity, especially in harsh conditions.

Aesthetics: color combinations and font choices play a significant role in visibility and brand alignment.

Cost: intricate designs can affect the budget while evaluating the intended environment and purpose, which enhances decision-making.

Key Takeaways of 5 Principles

  • Consider machine embroidery for uniformity and precision, especially with larger volumes of name tag patches.
  • Opt for hand embroidery if seeking unique, artisanal appeal with flexible design possibilities.
  • Choose high-quality polyester threads for durability and colorfastness, particularly in high-contact or harsh environments.
  • Align design aesthetics with brand identity using complementary colors and legible fonts to enhance recognition.
  • Balance cost with desired quality, utilizing volume discounts for larger orders to manage budget constraints effectively.

Explore further to refine your choice based on these guiding principles.

Understanding Different Embroidery Styles

When selecting an embroidery style for name tags, it is essential first to understand the various techniques available, each offering distinct aesthetics and functional benefits. Machine embroidery is prevalent due to its efficiency and precision. It allows for intricate stitch techniques and diverse thread types, accommodating a wide range of color choices. This method is particularly advantageous when uniformity is key, as it produces consistent results across large batches. However, design limitations may arise when dealing with very detailed patterns due to their mechanized nature. 

For example, if you have limited space on the breast of clothing you want the tag placed on while the name of the person pronounces multiple letters, you will definitely face size issues. What happens is when you ask the vendor to embroider long name tags in tight size, the limited capacity of traditional commercial embroidery machines is unable to produce acceptable results; you get a kind of messy overlapped name tag. 

In this case, I suggest you go for sharper fabric printing like woven; check out my blog, which differentiates between regular embroidery and woven patches.

Evaluating Name Tags Durability 

Selecting the right materials can greatly impact the longevity and performance of the patches. When considering durability, both fabric selection and thread quality play critical roles. The choice of fabric determines the patch’s resistance to wear and tear. For instance, heavy-duty fabrics such as twill or canvas offer enhanced durability compared to lighter materials. Meanwhile, thread quality influences the embroidery’s ability to endure frequent washing and exposure to elements. High-quality polyester threads, for example, are known for their colorfastness and strength.

To confirm name tag patches meet durability requirements, consider the following factors:

  1. Environment: Determine if the patches will be exposed to harsh conditions, such as direct sunlight or moisture, which may necessitate more robust materials.
  2. Use Frequency: Evaluate how often the patches will be worn and washed to select fabrics and threads that maintain appearance and integrity over time.
  3. Purpose: Identify whether the patches are for professional, recreational, or occasional use, influencing the balance between aesthetics and durability.

Exploring Cost and Budget 

When evaluating the financial implications, it’s important to balance quality with affordability. The cost of embroidery can vary greatly based on the intricacy of the design, the type of thread used, and the production method. Here are three key aspects to keep in mind:

  1. Cost Comparisons: Different embroidery styles, such as flat embroidery or 3D puff embroidery, come with varying price points. It’s important to compare these costs to determine which style fits within your budget while meeting your quality expectations.
  2. Budget Constraints: Understanding your budget constraints will guide your choices. If your budget is limited, prioritizing essential features over elaborate designs can help in managing costs effectively.
  3. Volume Discounts: Ordering in bulk often results in lower per-unit costs, making it a viable strategy for staying within budget. A wholesale patch maker should help in this regard.

Matching Style to Purpose

Selecting an embroidery style that aligns with the purpose of your name tags is important for guaranteeing they serve their intended function effectively. When considering purpose alignment, it’s essential to assess the environment in which the name tags will be used. For instance, in a corporate setting, a more formal and sleek embroidery style might be suitable, emphasizing professionalism and elegance. Conversely, for casual or creative environments, a vibrant and artistic design could better align with the atmosphere, enhancing the identity and engagement of the wearer.

Function focus is another key aspect when matching style to purpose. The embroidery should not only be visually appealing but also functional, offering durability and legibility for high-contact settings, such as hospitality or healthcare; durable materials and bold lettering secure longevity and easy readability, which are crucial for practical use. Additionally, considering the target audience is essential; for instance, children’s name tags might benefit from playful designs that capture attention and foster a sense of belonging.

Recommendations

Overall, I would highly recommend going for flat 2D embroidery patches for name tags. Keep the text short with standard font and fabric surface showing through. A show-through fabric actually means when you do not have extra space around the text, it is not fill-stitched (tatami) but stays as it is. 

If you want to know more about the topic, read my recent blog on how to customize name tags with custom embroidery

How to Customize Name Tags With Embroidered Patches

Customizing name tags with embroidered patches begins with selecting a suitable base material—plastic for indoor use, metal for durability, or fabric for flexibility. Gather supplies such as quality twill or cotton patches, and verify surfaces are clean and smooth to promote adhesion. Choose designs that reflect personal style and enhance readability; consider the impact of colors and textures. Attach patches using heat-activated adhesives or fabric glue for initial placement and reinforce with stitching methods like satin or backstitch for durability. Proper care and storage are essential for maintaining your customized name tags, guaranteeing they make a lasting impression. Explore further to enhance your creation.

Here Is 5 Step Quick Recipe

  • Select a name tag base material that complements the patch design and intended use.
  • Choose embroidery patch designs that align with personal interests and ensure readability with color contrast.
  • Properly prepare the name tag surface by cleaning and inspecting for imperfections before attaching patches.
  • Employ adhesive techniques or stitching methods to attach patches, balancing durability and adjustability securely.
  • Maintain and store customized name tags carefully to preserve their aesthetic quality and longevity.

Choosing Your Name Tag Base

Selecting the right base for name tags is important in customizing durable embroidered name tags. This choice greatly influences both the aesthetic appeal and the longevity of the name tag. Name tag materials are diverse, each designated to cater to different needs. Different names, different fonts, and name sizes are different too. Common options for base material include rubber for PVC, metal for pins, and fabric for flat embroidery. Plastic is lightweight and cost-effective, while metal provides a sleek, professional finish. Fabric bases, often used in embroidered patches, offer flexibility and a tactile quality.

When choosing name tag materials, consider the environment in which the name tag will be used. For instance, plastic may suffice for indoor events, but metal might be preferable for outdoor use due to its resilience. Additionally, the chosen material affects how color combinations appear. Metal can enhance bold, contrasting colors, while fabric allows for more subtle shading and blending.

Color combinations should be selected to guarantee readability and visual appeal. The base color should complement the embroidery to make the text stand out. By carefully considering these factors, you can create a name tag that not only meets functional requirements but also aligns aesthetically with personal or organizational identity.

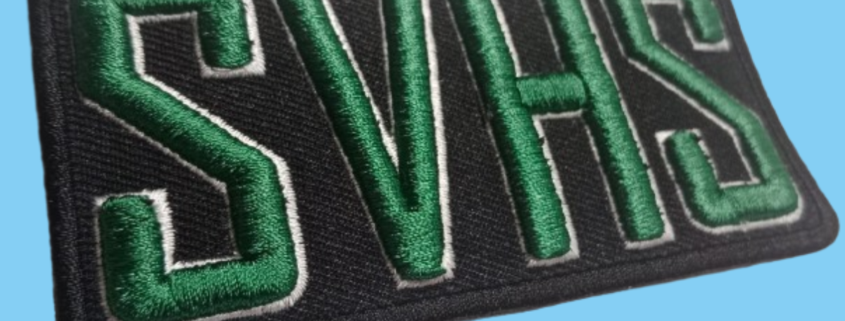
Selecting Embroidery Patch Designs

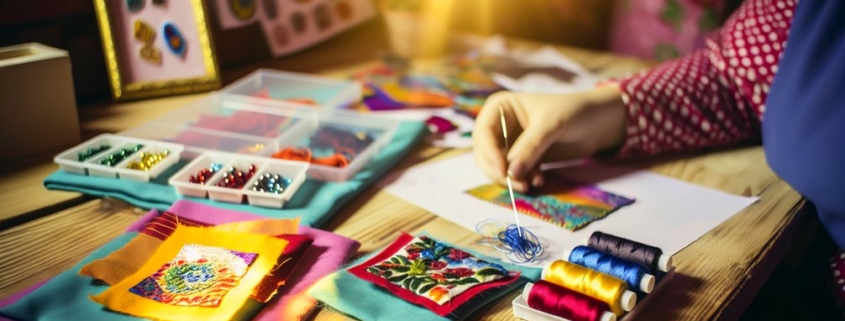
Crafting a visually appealing and meaningful embroidery patch design is fundamental to the customization process of name tags. Selecting the right design and emb style requires both creativity and careful consideration. Design inspiration can stem from a variety of sources, including personal interests, organizational themes, or cultural symbols. It is vital to choose designs that resonate with the intended message or identity of the wearer. The choice of patch materials also plays an essential role in the design process, affecting both the aesthetics and durability of the final product.

When selecting embroidery patch designs, consider the following elements to guarantee a successful outcome:

  • Color Palette: Choose colors that complement the name tag base and enhance readability.
  • Symbolism: Incorporate meaningful symbols or icons that convey the desired message or affiliation.
  • Text Style: Select fonts and text arrangements that maintain clarity and legibility.

Attention to these details guarantees that the embroidered patch not only enhances the visual appeal of the name tag but also effectively communicates the intended identity. By thoughtfully selecting embroidery patch designs, one can create a personalized and professional name tag that serves its purpose well, balancing aesthetics with functionality.

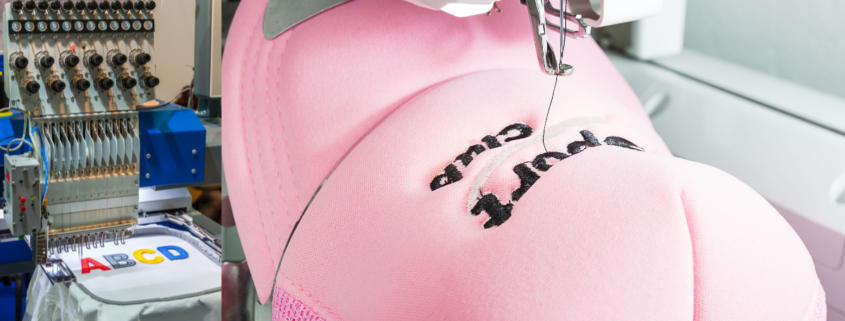
Gathering Necessary Supplies

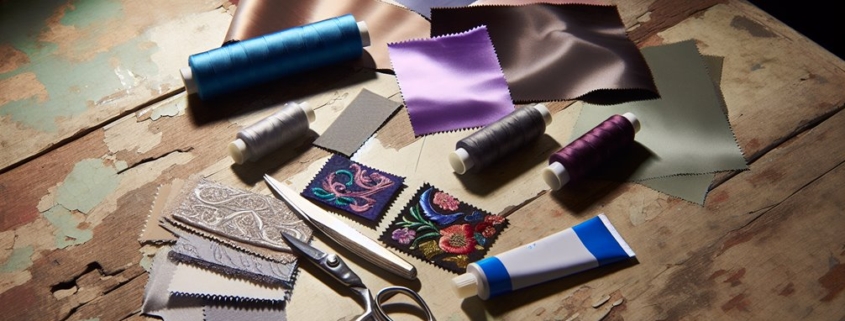
Starting on the journey of creating custom name tags with embroidered patches requires a meticulous gathering of essential supplies to guarantee a smooth and efficient process. The first step is selecting high-quality patch materials. This includes choosing between different fabrics such as twill, felt, or cotton, each offering unique textures and durability. Consider the purpose of your name tag: will it endure frequent washes or just occasional use? This decision will guide your choice of material.

Next, you’ll need embroidery threads in various colors to bring your design inspiration to life. Opt for threads that complement your chosen fabric and align with your design’s color scheme. An embroidery machine, or a reliable needle if you’re hand-stitching, is indispensable for crafting the patches. Confirm you have the appropriate stabilizers and backing materials to maintain shape and prevent puckering.

Additionally, gather basic sewing supplies such as scissors, pins, and a ruler. Transfer materials like tracing paper are useful for lining your design onto the fabric. Finally, keep in mind the importance of an iron and ironing board for smooth finishing. With these supplies, you’re well-prepared to start transforming your creative concepts into vibrant, personalized name tags.

Preparing Your Name Tag Surface

A well-prepared surface is vital for the successful application of embroidered patches onto name tags. Proper surface preparation guarantees a seamless bond, resulting in a polished and professional appearance. Begin by selecting appropriate name tag materials, such as fabric, plastic, or metal, each of which requires distinct preparation techniques. Thoroughly cleaning the surface is essential; any dust, oils, or residues can compromise adhesion and result in a less durable outcome.

Consider the following steps to guarantee your name tag surface is ready for patch application:

  • Inspect the name tag materials: Evaluate the surface for any irregularities or damage. Addressing any flaws beforehand will prevent complications later.
  • Clean the surface meticulously: For fabric name tags, use a lint roller or gentle washing. Plastic and metal surfaces benefit from a mild cleanser and soft cloth.
  • Dry thoroughly before proceeding: Moisture can lead to poor adhesion, so guarantee the surface is completely dry before attaching your patch.

These steps are foundational for achieving a successful customization of your name tags. By investing time in surface preparation, you enhance not only the aesthetic appeal but also the longevity of your customized name tags.

Attaching the Embroidered Patch

With the surface meticulously prepared, the next step in customizing your name tag is the precise attachment of the embroidered patch. Confirming proper patch alignment is essential for achieving a professional appearance. Begin by placing the patch on the name tag and adjusting its position until it aligns perfectly with the intended design layout. Careful attention to alignment at this stage can prevent the need for future corrections.

To adhere the patch, select from several adhesive options, each with distinct characteristics. Heat-activated adhesive, a popular choice, offers a durable bond when applied with an iron. In contrast, fabric glue provides a more flexible approach, allowing for slight adjustments before setting. Finally, adhesive sheets offer a no-mess solution, requiring only pressure to bond.

Adhesive Type

Application Method

Adjustability

Heat-Activated

Ironing

Low

Fabric Glue

Direct Application

Moderate

Adhesive Sheets

Pressure-Based

High

When applying any adhesive, follow the manufacturer’s instructions closely to confirm effectiveness and longevity. Be mindful of the material’s heat tolerance and adhesive compatibility to avoid damage. A well-attached patch not only enhances the name tag’s aesthetic but also adds a personalized touch that remains intact over time.

Securing the Patch With Stitching

Securing the patch with stitching provides an additional layer of durability and aesthetic appeal to the customized name tag. When choosing from various patch types, such as iron-on or sew-on, stitching remains a vital step to guarantee longevity. This process not only fortifies the attachment but also allows for creative expression through different stitching techniques. Selecting the appropriate technique is essential for maintaining the integrity of both the patch and the underlying fabric.

  • Running stitch: A simple yet effective method, ideal for beginners, offering a clean look while securing the patch effectively.
  • Satin stitch: Provides a polished and professional finish, often used to blend the edges of the patch seamlessly with the fabric.
  • Backstitch: Offers a robust and durable solution, perfect for heavy-duty applications where the name tag must withstand wear and tear.

Each technique varies in complexity and suitability based on the patch type and the desired outcome. It’s important to take into account the fabric’s texture and the patch’s design to avoid puckering or distortion. By understanding these stitching techniques, one can enhance both the functionality and the visual appeal of the customized name tag, guaranteeing it stands the test of time.

Adding Personal Touches

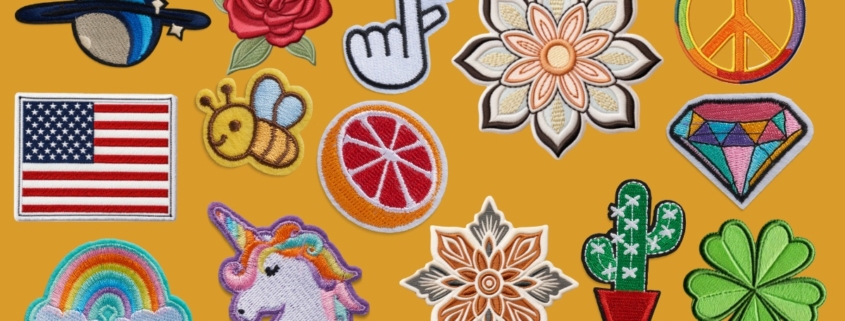
Infusing name tags with personal touches transforms a simple accessory into a unique statement piece. Personalization ideas can range from selecting specific color schemes to incorporating motifs that resonate with the individual’s personality or interests. For instance, choosing a patch design that reflects a hobby, such as a musical note for a musician or a paintbrush for an artist, can convey a sense of identity and pride. Meanwhile, the addition of initials or names in specialized fonts offers a subtle yet impactful way to enhance the tag’s individuality.

Creative expressions through embroidered patches provide endless opportunities to showcase personal style while maintaining professional appeal. Consider experimenting with textures and fabrics; a velvet background or metallic threads can add sophistication and depth to the name tag. Incorporating symbols or icons that hold sentimental value, such as a cultural emblem or a family crest, further adds a layer of personal significance.

It is essential to guarantee that these elements are cohesive and do not overwhelm the overall design. Striking a balance between creativity and clarity guarantees that the name tag remains legible and serves its primary purpose effectively. Personal touches should enhance, not detract from, the name tag’s functionality and readability.

Caring for Your Customized Tags

As personalized name tags become cherished accessories, maintaining their longevity through proper care becomes paramount. Proper cleaning techniques and storing tips are essential to maintain the vibrancy and integrity of embroidered patches. Clean your customized tags with gentle care to avoid damage. Hand washing is preferable; use mild detergent and lukewarm water. Avoid harsh scrubbing as it may fray delicate threads and diminish the design’s vibrancy.

When storing your name tags, guarantee they are kept in a cool, dry place, away from direct sunlight and moisture, which can fade and warp the fabric over time. Consider these storing tips to protect your investment:

  • Flat Storage: Lay tags flat in a drawer or box to prevent creasing and deformation.
  • Use a Garment Bag: Store tags attached to clothing in a garment bag to protect them from dust and pests.
  • Humidity Control: Utilize silica gel packets or a dehumidifier to maintain an ideal storage environment.

These practices will help preserve the aesthetic and functional qualities of your name tags. By adhering to these guidelines, you can guarantee that your personalized accessories remain pristine and continue to convey your unique identity for years to come.

Can Embroidered Patches Be Reused on Different Name Tags?

Embroidered patches can potentially be reused on different name tags, contingent upon the patch attachment method. Utilizing versatile attachment options, such as Velcro, enhances tag versatility, allowing for easy removal and reapplication without compromising the patch’s integrity.

What Types of Threads Are Best for Embroidered Patches?

When selecting thread types for embroidered patches, prioritize polyester and rayon threads. These materials enhance patch durability, offering resistance to fading and wear, ensuring longevity and maintaining vibrant colors throughout repeated use and wash cycles.

Are There Eco-Friendly Materials for Creating Embroidered Patches?

The demand for eco-friendly options in embroidered patches is rising, with sustainable practices focusing on organic cotton, recycled polyester threads, and natural dyes. These materials greatly reduce environmental impact while maintaining the quality and durability of traditional alternatives.

Can Embroidered Patches Be Made Waterproof?

Yes, embroidered patches can be made waterproof by incorporating a waterproof backing. This enhancement increases patch durability, ensuring longevity even in wet conditions, thereby maintaining their appearance and functionality across various applications and environments.

5 Reasons Retro Designs Making A Comeback in Custom Patches

You might’ve noticed a surge in retro designs when it comes to custom patches, and it’s not just a fleeting trend. This revival taps into deep-seated nostalgia, evoking memories tied to pop culture and personal experiences. As more people embrace the DIY movement, these patches become a canvas for unique self-expression, showcasing vibrant colors and distinctive styles. They also bridge gaps between generations, fostering a sense of community among those who share similar passions. But what’s driving this renewed interest, and how does it reflect broader cultural shifts?

I personally have explored 5 big reasons for this; here are they explained;

#1 Nostalgia as a Driving Force

Nostalgia plays a powerful role in the appeal of retro designs in custom patches. When you see a patch that evokes memories of a simpler time, it sparks a connection to your past. You might remember favorite bands, childhood cartoons, or iconic fashion trends that defined your youth.

These designs tap into your emotions, making them more than just accessories; they become personal statements. You find yourself drawn to colors, fonts, and imagery that remind you of days gone by.

This longing for familiarity often leads you to choose patches that not only showcase your style but also tell a story. In a world that’s constantly changing, retro designs offer comfort and a sense of belonging that resonates deeply with you.

#2 Influence of Pop Culture

Pop culture’s influence on retro designs in custom patches is undeniable. You can see it everywhere, from vintage band logos to iconic TV shows and movies.

These designs resonate with you, tapping into your shared memories and experiences. As trends from the past resurface, you’re drawn to patches that feature beloved characters or motifs that remind you of your childhood.

This nostalgia creates a connection, making each patch more than just an accessory; it’s a statement about your identity and interests. You might sport a patch that showcases a classic video game or a retro brand, signaling your appreciation for the culture that shaped your generation.

Ultimately, these patches let you express your love for the past while staying stylish in the present.

#3 DIY Movement and Personalization

The resurgence of retro designs in custom patches has sparked a vibrant DIY movement, allowing you to express your individuality and creativity.

You can easily create your own patches that reflect your personal style, whether it’s through sewing, embroidery, or iron-on techniques. The charm of retro aesthetics encourages you to mix and match colors, fabrics, and patterns, resulting in unique pieces that tell your story.

By embracing DIY, you’re not just making a fashion statement; you’re also participating in a culture that values self-expression over mass production.

Plus, crafting your own patches can be a fulfilling and therapeutic experience. Dive into this movement, and let your imagination run wild as you personalize your wardrobe with one-of-a-kind designs.

#4 Bold Colors and Unique Aesthetics

Amid the vibrant world of custom patches, bold colors and unique aesthetics stand out as key elements that can transform any outfit. When you choose patches with striking hues, you instantly elevate your style.

These vivid colors catch the eye, making your ensemble more memorable and fun. Think bright reds, electric blues, and sunny yellows—these shades can express your personality and create a visual impact.

Unique aesthetics play a crucial role, too. Retro designs often feature whimsical shapes or playful typography, giving your patches a distinctive flair.

#5 Connection to Subcultures and Communities

Bold colors and unique aesthetics are more than just eye-catching; they often connect you to specific subcultures and communities.

When you wear retro custom patches, you’re not just showcasing art; you’re signaling your affiliation with like-minded individuals. Whether it’s punk, skate, or vintage culture, these patches serve as a badge of honor, reflecting shared values and experiences.

They create a sense of belonging, allowing you to express your identity and connect with others who appreciate the same styles and ideals. Each patch tells a story, linking you to a larger narrative that transcends generations.

Exploring Old-School Insignia in Vintage Patch Designs

When you consider the allure of vintage patch designs, you might find yourself intrigued by the stories embedded in old-school insignia. Each patch, from military emblems to scout badges, tells a tale of identity and achievement, crafted with a level of detail that speaks to a bygone era. As you explore their rich history and craftsmanship, you’ll uncover why these patches are more than mere decorations. What makes them so appealing today, and how do they connect us to our past? The answers might surprise you.

History of Vintage Patches

Vintage patches have often been a beloved way for individuals to express their identities and affiliations throughout history. From military insignias to scout badges, these small pieces of fabric have carried significant meaning. You might find them on jackets, bags, or hats, showcasing your interests, hobbies, or achievements.

The origins of patches can be traced back to the early 19th century when they began to appear in military uniforms to denote rank and unit. As time passed, they evolved into popular elements of youth culture, especially in the 1960s and 70s, reflecting rebellion and individuality.

Whether you’re a collector or appreciate their aesthetic appeal, understanding their history can deepen your connection to these unique artifacts that tell stories of personal and collective identity.

Types of Old-School Insignia

Old-school insignia come in various forms, each telling a distinct story about the wearer’s background and interests.

You’ll frequently encounter military patches representing service branches or units, often adorned with symbols of bravery and honor.

Then there are scout badges, showcasing achievements and skills, giving a glimpse into a person’s adventurous spirit.

Club patches often reflect affiliations with motorcycle or social groups, highlighting camaraderie and shared passions.

Additionally, you might find brand logos from vintage clothing or outdoor gear, signifying loyalty to a particular lifestyle.

Lastly, hobbyist patches, like those for rock climbing or surfing, communicate personal interests and achievements.

Each type of insignia not only enhances style but also serves as a conversation starter, connecting you to a rich history.

Craftsmanship and Materials

The intricate details of vintage patch designs often showcase exceptional craftsmanship and a variety of materials that grow their appeal.

When you examine these patches, you’ll notice the skillful stitching techniques, such as chain stitch or satin stitch, that create depth and texture. Artisans often used high-quality threads, including cotton and silk, to ensure durability and vibrancy in colors.

Fabrics like felt, canvas, and leather were common choices, each contributing a unique character to the patch. These materials not only add visual interest but also reflect the era’s style.

As you explore vintage patches, appreciate the time and effort that went into crafting each piece, making them not just decorative items but also pieces of art steeped in history.

Modern Resurgence of Vintage Patches

In recent years, there’s been a notable revival of interest in vintage patches, capturing the imagination of fashion enthusiasts and collectors alike. You might’ve noticed these patches popping up on jackets, bags, and even hats, adding a unique flair to modern outfits.

This resurgence is rooted in a desire for individuality and a nostalgic connection to the past. Brands are tapping into this trend by reinterpreting classic designs and merging old-school aesthetics with contemporary styles.

You’ll find that these patches often tell a story, reflecting cultural moments or personal experiences. Whether you’re a seasoned collector or just starting, there’s no denying the charm and character that vintage patches bring to your wardrobe.

Embrace the nostalgia and let your style stand out!

Collecting and Displaying Patches

Patches can be more than just decorative pieces; they’re a canvas for storytelling and personal expression.

When you dive into collecting patches, focus on what resonates with you—be it vintage military insignia, band logos, or cultural symbols. Start by setting a budget and scouting local thrift shops, flea markets, or online platforms.

Once you’ve gathered your collection, think about how you want to display them. Shadow boxes, frames, or even a dedicated wall space can showcase your favorites beautifully.

Don’t shy away from getting creative; mix and match sizes, colors, and themes to tell your unique story. Remember, each patch holds a memory or a vibe, making your display a true reflection of your journey.

Happy collecting!

What Are the Most Sought-After Vintage Patch Designs?

When you think about sought-after vintage patch designs, you’ll find that military insignias, concert tour patches, and brand logos capture the most interest.

Collectors love unique pieces that tell a story from the past.

How To Authenticate a Vintage Patch?

To authenticate a vintage patch, examine the stitching, fabric, and backing.

Check for wear and age, and research the brand’s history.

Don’t forget to compare it with known authentic examples for confirmation.

What Are Care Tips for Vintage Patches?

To care for vintage patches, avoid direct sunlight and moisture.

Gently clean them with a soft brush, and store them flat in a cool, dry place.

Don’t iron them directly; use a cloth if needed.

What Are the Common Mistakes to Avoid When Collecting Patches?

When collecting patches, avoid assumptions about authenticity, neglecting condition details, and overpaying for common items.

Don’t rush purchases; take time to research, compare prices, and understand the market to build a valuable collection.

Can I Customize My Own Vintage-Style Patches?

Yes, you can customize your own vintage-style patches!

Choose designs, colors, and materials that reflect your style.

Many online services let you upload your artwork, making it easy to create something unique and personal.

Why Raised Stitching Makes 3D Embroidery Patches Stand Out

When you consider the impact of raised stitching in 3D embroidery patches, it’s clear that this technique uplifts the overall design. You’ll notice how the added dimension creates a striking visual appeal, catching the eye in a way flat patches simply can’t. The texture and vibrancy not only enhance logos and designs but also contribute to their durability, making them a wise choice for both fashion and branding. But what exactly makes these elements work together to create such memorable patches? Let’s explore further.

Raised Stitching for 3D Custom Embroidery

Raised stitching refers to a technique in embroidery where threads are layered to create a three-dimensional effect, giving designs depth and texture. This method involves stitching over previously laid threads and rubber foam, which elevates certain areas of the design. By varying the thread types and colors, you can create unique patterns that stand out.

It’s important to choose the right materials, as thicker threads and premium-quality foam often yield a more pronounced elevation. This technique can transform simple designs into stunning works of art that capture attention effortlessly.

Benefits of 3D Embroidery

One of the key benefits of 3D embroidery is its ability to grab attention and create a lasting impression. This embroidery work not only adds dimension but also enhances the texture, making your branding more memorable. Plus, 3D embroidery stands up better over time, resisting fading and wear, which means your investment lasts longer.

You’ll find that this style is versatile, fitting well on various fabrics and garments, from hats to jackets. Ultimately, 3D embroidery helps you stand out in a crowded market, ensuring your message is seen and remembered, which is crucial for effective branding and promotion.

Visual Appeal Puffy Stitch

The striking visual appeal of 3D embroidery patches is undeniable, thanks to the raised stitching that adds depth and texture to your designs. This technique not only makes your patches more eye-catching but also enhances the overall aesthetic.

The shadows and highlights created by the dimensional effect provide a unique look that flat embroidery can’t achieve.

You’ll find that colors appear more vibrant, and intricate details become more pronounced, allowing your design to shine.

Whether you’re using patches for branding, fashion, or personal expression, the visual enhancements from raised stitching elevate your designs, ensuring they capture the attention they deserve.

Durability and Longevity

The thicker threads used in 3D designs create a robust structure that resists fraying and fading, ensuring your patches retain their appearance over time. Additionally, the high-quality materials typically utilized in these patches enhance their resilience against environmental factors like moisture and sunlight.

This means you can confidently showcase your patches on jackets, hats, or bags, knowing they’ll last. Investing in raised stitching not only elevates your style but also guarantees that your patches will endure, making them a smart choice for long-lasting expression.

Applications in Fashion and Branding

3D embroidery patches have found their way into the heart of modern fashion and branding, transforming how you express your identity and promote your brand.

You can easily incorporate these vibrant patches into jackets, hats, and bags, adding a unique touch to your wardrobe. Brands utilize raised stitching to create eye-catching logos that stand out, making a lasting impression on customers.

Whether you’re customizing apparel for a team or showcasing your business, these patches enhance visibility and appeal. Plus, they convey a sense of quality and craftsmanship that resonates with consumers.

Everything You Need to Know About Puffy 3D Patches

When you think about personalizing your fabric items, puffy 3D patches might not be the first thing that comes to mind, but they can transform your clothing and accessories in unique ways. You’ll find various types, each offering distinct textures and designs that stand out. Understanding how to apply and care for these patches can make all the difference in their longevity and effectiveness. So, what are the best techniques for adding these dynamic embellishments to your projects? Let’s explore the intricacies of puffy 3D patches and how they can elevate your creative endeavors.

What Are Puffy 3D Patches?

Puffy 3D patches are eye-catching embellishments that add a unique texture and depth to various fabric items. You’ll find these patches made from materials like foam or embroidery, giving them a raised effect that stands out.

Their vibrant colors and intricate designs make them perfect for personalizing clothing, bags, hats, and more. When you apply a puffy 3D patch, you’re not just enhancing the visual appeal; you’re also adding a tactile element that invites touch.

These patches are often sewn or ironed onto fabric, ensuring they’re durable and long-lasting. Whether you’re looking to make a fashion statement or express your creativity, puffy 3D patches offer endless possibilities for customization and self-expression.

Types of Puffy 3D Patches

When exploring the world of 3D patches, you’ll discover a variety of types that cater to different styles and preferences.

Firstly, you have embroidered patches, which combine vibrant threads with a raised texture, adding depth to your designs.

Then, there are rubber patches, known for their durability and flexibility, perfect for outdoor gear.

You might also encounter PVC patches, which offer a soft, smooth feel and are often used for custom logos.

Another option is leather patches, lending a classic, rugged look to your apparel.

Lastly, fabric patches provide a softer appearance and can be easily customized with various colors and designs.

Each type has its unique charm, allowing you to express your personality effortlessly.

Application Techniques

Choosing the right type of puffy 3D patch is just the beginning; how you apply them can significantly impact their appearance and longevity.

First, ensure the surface is clean and dry to promote strong adhesion. If you’re using iron-on patches, set your iron to the appropriate temperature, cover the patch with a cloth, and press firmly for the recommended time.

For sew-on patches, use a sturdy needle and thread that matches the patch’s colors. Make small, even stitches around the edges for a neat finish.

If you’re opting for adhesive patches, peel the backing and press firmly onto the desired area, applying even pressure.

Always follow the manufacturer’s instructions for the best results, ensuring your patches last longer.

Creative Uses for Puffy Patches

A world of creativity opens up when you start incorporating puffy 3D patches into your projects. You can elevate everyday items like jackets, bags, and hats by adding these unique designs.

Consider customizing your sneakers with patches that reflect your personality or interests. They’re perfect for scrapbooking, too; simply stick them onto pages to create a playful, tactile experience.

If you’re organizing a party, use puffy patches as fun decorations or party favors. You can even transform simple home decor by attaching them to cushions or wall art for a pop of color and dimension.

The possibilities are endless, so let your imagination run wild and explore all the ways puffy patches can enhance your creations!

Care and Maintenance Tips for 3D Patches

Proper care and maintenance ensure that your puffy 3D patches remain vibrant and intact for a long time.

To keep them looking fresh, wash your patches gently by hand using cold water and mild detergent. Avoid machine washing or drying, as the heat can damage the material.

When storing, keep them in a cool, dry place away from direct sunlight to prevent fading. If you notice any dirt or grime, spot clean with a damp cloth instead of soaking them.

Be cautious when ironing; use a low setting and place a cloth between the iron and the patch.

Are Puffy 3D Patches Safe for Children’s Clothing?

Yes, puffy 3D patches are generally safe for children’s clothing.

They’re made from non-toxic materials and can withstand regular wear.

Just ensure they’re securely attached to prevent any choking hazards during playtime.

Can Puffy Patches Be Used on All Fabric Types?

You can use puffy patches on many fabric types, but it’s best to check the care instructions first.

Some materials, like nylon or silk, may not hold the adhesive as well as cotton or denim.

How Long Do Puffy 3D Patches Typically Last?

Puffy 3D patches typically last several years with proper care.

If you wash them gently and avoid high heat, you’ll keep them looking vibrant and intact longer.

Always follow the manufacturer’s guidelines for best results.

Are There Any Environmentally Friendly Puffy 3D Patch Options?

Yes, there are environmentally friendly options for puffy 3D patches.

You can look for patches made from recycled materials or biodegradable substances.

These choices help reduce waste while still providing the style you want.

Can I Create Custom Designs for Puffy 3D Patches?

Yes, you can create custom designs for puffy 3D patches.

Many suppliers offer options for personalized artwork, allowing you to bring your unique vision to life.

Just ensure your design meets their specifications for the best results!

Conclusion

Puffy 3D patches are a fun and versatile way to personalize your fabric items. Whether you choose to sew, iron, or use adhesive methods, these dynamic embellishments can elevate your style and creativity. With a little care, you can keep them looking fresh and vibrant for a long time. So go ahead, explore the different types and applications, and let your imagination run wild with the endless possibilities of puffy patches!

The Best Waterproof Patches for Marine and Water Gear

When it comes to selecting the best waterproof custom patch for marine and water gear, you’ve got a variety of options that can enhance both functionality and style. You have consider factors like the materials used, such as nylon or polyester, and the methods of waterproofing, which can significantly impact durability. Different brands offer unique features, but what really sets a patch apart? Understanding these nuances can help you make an informed choice that meets your specific needs. So, let’s explore what makes a patch truly reliable for your aquatic adventures.

Types of Waterproof Patches

When it comes to waterproof custom patches, you’ve got few types to choose from, each designed to meet different needs.

To start, adhesive patches are easy to apply and perfect for quick fixes on your marine gear.

If you’re looking for durability, Pvc rubber patches provide a strong, long-lasting seal that withstands harsh conditions.

You might also consider embroidered patches, which not only offer a unique look but can be treated for waterproofing, making them ideal for style and function.

For heavy-duty needs, consider custom metal pins; they’re robust and can handle extreme exposure to water.

Ultimately, selecting the right patch depends on your specific application and the conditions your gear will face, so weigh your options carefully before making a choice.

Materials Used in Waterproof Patches

Look for high-quality fabrics like nylon or polyester, as they repel water and resist fading from UV exposure. These materials are lightweight yet durable, making them ideal for active use.

Additionally, consider patches made with PVC or rubber, which offer excellent waterproofing and flexibility. For adhesive backing, opt for industrial-strength options that withstand moisture and temperature fluctuations.

Some patches even incorporate specialized coatings to enhance waterproof capabilities further. By selecting the right materials, you’re ensuring your patches maintain their integrity and visibility, even when exposed to challenging conditions on the water.

Customization Options Available

Many options exist for customizing waterproof patches to suit your specific needs and preferences. You can choose from various sizes and shapes, ensuring the patch fits perfectly on your gear.

Color options are nearly limitless, allowing you to match your gear or express your style. You can also select different types of backing, like sew-on or Velcro, depending on how you plan to apply the patch.

Personalization doesn’t stop there; you can add logos, text, or even intricate designs to make the patch uniquely yours. Additionally, you can opt for reflective elements for better visibility in low-light conditions.

Benefits of Waterproof Custom Patches

Waterproof custom patches offer a host of benefits that enhance both functionality and style for your marine gear.

First, their durability ensures they withstand harsh marine environments, resisting fading, fraying, and water damage. You won’t have to worry about your gear looking worn or losing its identity.

Second, these patches are easy to apply and remove, allowing you to switch up your style whenever you want. Additionally, they can help with identification, making it easier to spot your gear among others.

Finally, waterproof patches add a personalized touch, showcasing your unique brand or interests while remaining practical.

How Do I Properly Care for Waterproof Custom Patches?

To properly care for waterproof custom patches, regularly clean them with mild soap and water.

Avoid harsh chemicals, and air dry.

Keep them out of direct sunlight to maintain color and adhesive quality.

Can Waterproof Patches Withstand Extreme Temperatures?

Yes, waterproof patches can withstand extreme temperatures, depending on the materials used.

You should always check the manufacturer’s specifications to ensure they meet your needs for durability in harsh conditions, so you stay prepared.

Conclusion

In conclusion, when it comes to waterproof custom patches for your marine gear, you’ve got plenty of options to choose from. By selecting the right materials and customization features, you can enhance both the functionality and style of your equipment. So, gear up with the best patches to ensure your gear looks great and performs even better on the water!

How Waterproof Patches Can Improve Durability of Rain Jackets

When you think about maintaining your rain jacket’s durability, waterproof patches might not be the first solution that comes to mind. However, these patches can effectively seal up tears and holes, preserving the integrity of your jacket and keeping you dry during unexpected downpours. You might be surprised to learn how easy they are to apply and the range of options available. But what should you consider before choosing the right patch for your needs? Exploring that question could change how you approach your outdoor gear.

Benefits of Using Waterproof Patches

Using waterproof patches not only repairs your rain jacket but also enhances its overall durability and functionality.

These patches not only seal up tears but are also useable for customization. They also prevent water from seeping in and keeping you dry during heavy downpours. You’ll appreciate how they restore the jacket’s original waterproof capabilities, extending its lifespan significantly.

With waterproof patches, you can confidently tackle outdoor adventures, knowing your jacket is both functional and stylish.

Types of Waterproof Patches

Waterproof patches come in various types, each designed to meet specific repair needs for your rain jacket.

You’ll find adhesive patches that stick directly to the damaged area, offering quick fixes for small holes.

Fabric patches provide a more durable solution, often requiring sewing or heat sealing for a secure fit.

If you’re looking for flexibility, Pvc silicone patches conform well to the fabric, making them great for irregular shapes.

For extreme conditions, consider using waterproof tape, which can cover larger damaged areas effectively.

Lastly, you might encounter self-adhesive patches that blend seamlessly with the jacket, enhancing both aesthetics and functionality.

Choosing the right type ensures your rain jacket stays reliable and ready for your next adventure.

How To Stick Waterproof Patch To Rain Jacket

Applying patches effectively is crucial for ensuring your rain jacket remains functional and durable.

Start by cleaning the area around the tear or hole with a damp cloth to remove dirt and moisture. Once dry, trim the patch to fit the damaged area, leaving a bit of extra space around the edges.

If your patch requires heat activation, use an iron on a low setting, placing a cloth between the patch and the iron to avoid damage. Firmly press down for the recommended time, ensuring the patch adheres well.

For adhesive patches, peel off the backing and press it onto the clean, dry fabric.

Lastly, let the patch cure for at least 24 hours before exposing it to moisture.

How to Take Care of Patches & Rain Jackets

Keeping your rain jacket in top shape goes beyond just patching up damages. Regularly wash it according to the care label to remove dirt and oils that can compromise its waterproofing.

Use a gentle detergent; harsh chemicals can damage the fabric. After washing, consider reapplying a durable water-repellent (DWR) treatment to maintain its water resistance.

Air-dry the jacket instead of using a dryer, as heat can affect the waterproof membrane. Store your jacket in a cool, dry place away from direct sunlight to prevent fading and degradation.

Finally, inspect for any wear and tear often so you can apply patches or repairs before small issues become bigger problems. Taking these simple steps will keep your rain jacket performing well.