Archive for month: January, 2025
Exploring the Hook-and-Loop System for Velcro Patches
You must have used the hook-and-loop Velcro pairs in school shoes in childhood. But you might be surprised to learn these fasteners are one of the growing demands in custom patches. It is more than just a practical fastener; it’s a design inspired by nature itself. Understanding how it works opens up a world of possibilities for its application across various fields. But what makes Velcro stand out against traditional fasteners, and how can you maximize its benefits? The answers might change your perspective on this everyday patch type.
History of Velcro
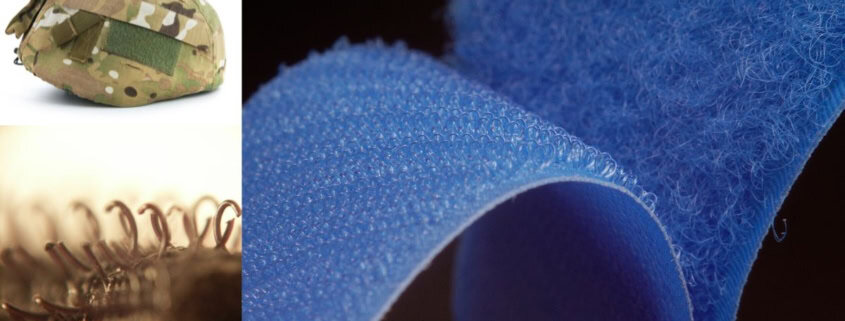
The history of Velcro traces back to the early 1940s when an engineer from Switzerland, George de Mestral, invented it after a walk in the woods.
He noticed how burrs keep sticking stuck to his clothes and his dog’s fur, sparking an idea. Intrigued by this natural mechanism, he began studying the burrs under a microscope.
His observations led him to create a fastener with two components: one side featuring tiny hooks and the other side covered in loops.
After years of development, he patented his invention in 1955.
By the 1960s, Velcro had gained popularity in various industries, from fashion to aerospace.
Today, it’s a household name, revolutionizing how we think about fasteners and closures in everyday life.
How Hook-and-Loop Works
As you explore how hook-and-loop fasteners work, you’ll discover that their design mimics nature’s own mechanisms. The system consists of two components: hooks and loops.
When you press the two sides together, the tiny hooks catch onto the soft loops, creating a secure bond. This interaction is similar to how burrs cling to animal fur, allowing for easy attachment and detachment.
You will notice that when you pull the pieces apart, the hooks release from the loops with a satisfying sound. This simplicity in design enables versatility and ease of use.
The fasteners are lightweight, durable, and can withstand numerous cycles of use, making them an ideal choice for various applications. Understanding this mechanism reveals the genius behind the hook-and-loop system.
Use of Velcro Patches
Understanding how hook-and-loop fasteners work opens up a world of possibilities for their applications.
You’ll find Velcro patches in various industries, from fashion to healthcare. In clothing, they’re perfect for adjustable straps, allowing for a customizable fit. In the military, they’re used on uniforms to attach badges and rank insignia quickly.
You might also see them in sports gear, providing secure closure for shoes and protective pads. In-home organization, Velcro hook and loop help manage cables and keep items in place.
For children, they’re great in toys, encouraging interactive play without complicated fasteners.
Advantages Over Traditional Fasteners
Velcro patches offer several advantages over traditional fasteners, making them an appealing choice for various applications.
First, they’re incredibly easy to use; you can press them together and pull them apart, saving you time and effort. Unlike buttons or zippers, Velcro doesn’t require precise alignment, so you won’t struggle to fasten or unfasten items.
Additionally, Velcro set provides a secure hold while still allowing for flexibility and comfort, which is especially beneficial in clothing and gear. They’re also lightweight and can be applied to a variety of surfaces without adding bulk.
Lastly, the versatility of the Velcro pair means you can personalize and customize them, giving you endless creative possibilities while maintaining practicality.
Care and Maintenance Tips
Proper care and maintenance are key to keeping your Velcro functioning optimally.
First, regularly check for debris like lint or hair that can clog the hooks. Use a soft brush or tape to clean the surface gently.
If your patches get dirty, hand wash them in cold water with mild detergent, then air dry. Avoid using fabric softeners, as they can reduce the hook’s grip.
When storing patches, keep them flat to prevent the hooks from getting bent or damaged.
If you notice any wear and tear, consider replacing them before they lose their effectiveness.
With these simple steps, you can ensure your Velcro patches remain reliable and durable for all your needs.
 Custom Patches Mania
How to Create Club Insignia With Custom Motorcycle Patches
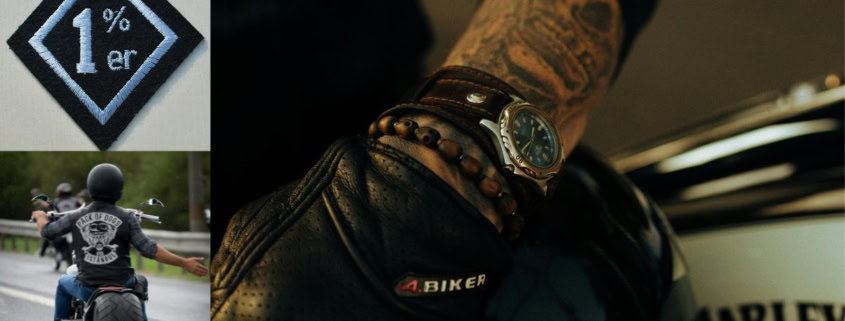
Creating club insignia should be the first thing to do before joining any biker club. Even if you want to maintain space from traditional motorcycle groups, you would still need a distinguishing badge for the rule as independent biker patches.
Let’s talk about being a club member first.
Collaborating on design ideas can lead to something truly unique, but it’s crucial to consider colors and materials that reflect your club’s spirit. As you explore these elements, you’ll discover how each choice impacts the final product, and understanding this can unlock a deeper connection within your club. What comes next may surprise you.
Defining Your Club’s Identity
The first step is defining club identity. Think about the core values and symbols that should explain your members; this is where your insignia will take shape. Your insignia isn’t just a design; it represents the values, beliefs, and mission of your group.
I would recommend you discuss the principles with your group members. Things like what’s your club about? Is it focused on camaraderie, adventure, or a specific cause?
Next, consider your target audience. Who do you want to attract? Understanding this will help shape your insignia’s message.
Think about symbols, color palettes, and themes that expose the club’s ethos. This will be defining your identity, you create a strong foundation for your insignia.
Designing the Insignia
The next step is sketching, drawing, and getting on board with a graphic designer. Take down notes with your designer you have collected in the previous step of defining club identity. Start by brainstorming ideas that reflect your club’s values, history, and purpose.
Gather input from all members to ensure everyone feels represented. Consider incorporating elements like your club’s name, a mascot, or symbols that resonate with your group’s mission.
Sketch out multiple designs, focusing on simplicity and clarity; a well-designed insignia should be easily recognizable and memorable.
Choosing Colors and Fonts
In this subsidiary step of design, you must take on fonts and colours. They both significantly impact its overall appeal and recognizability. Start by choosing colors that reflect your club’s personality and values.
Bold colors like red or black can convey strength and unity, while softer hues might suggest camaraderie and fun. Ensure your palette has good contrast for visibility, especially from a distance.
Next, pick fonts that complement your design. A bold, sans-serif font can convey a modern vibe, while a script font adds a classic touch. Fonts like ‘Gothic Biker’ are hot choices for big-size rockers and inverted rockers. I would suggest you avoid overly intricate designs that can be hard to read.
Selecting Materials and Techniques
Choosing the right materials and techniques of embroidery is essential for ensuring durability of biker motocycle club insignias.
Ask your vendor to use high-quality fabric, like twill, woven, unwoven fusing, denim, leather and felt if necessary. Think about embroidery versus printing. Embroidery offers a classic, textured look, while printing allows for intricate designs and vibrant colors. If you opt for embroidery, ensure the thread is fade-resistant and strong.
Let me give a lifetime advice here: always buy fill stitched embroidered insignias over fabric made. Fill stitching (tatami) made patches are long-lasting and give premium looks.
Make your insignia truly stand out!
Ordering and Applying the Patches
Ordering and applying customized motorcycle emblems is a key step. Choose a reputable supplier who specializes in custom designs. You can browse on the internet for ‘Best biker patches’. Send the homework you have done until now and set a scheduled call with a company representative, if necessary.
Once you place your order, be sure to confirm the production timeline so you know when to expect your patches.
When they arrive, inspect each patch for quality. To apply them, you can either sew them on or use iron-on backing if it’s available.
If sewing, use a strong thread and reinforce the edges to prevent fraying. For iron-on patches, follow the manufacturer’s instructions carefully.
With your patches applied, you’ll be ready to display your club’s unique insignia proudly!
Creating a club insignia with custom motorcycle patches is an exciting way to showcase your identity and values. By defining your mission, collaborating on design ideas, and selecting the right colors and materials, you’ll craft a meaningful emblem that resonates with all members. Once you’ve ordered from a reputable supplier, applying the patches carefully will ensure your club’s spirit shines through. Embrace the journey of creating something uniquely yours, and ride proudly with your new insignia!
P.S., do not forget to discuss size and quantity, as they are both highly integrated with overall cost. Remember to keep functionality in mind, ensuring they fit well on your biker vests.
![]()
From small monograms to bold back patches and rockers, we bring your custom patches vision to life with unparalleled expertise and flair. Join the Patches Mania revolution and let your creativity soar!