How To Sew-On Custom Patches Onto Hat

Sew a patch on a hat, is adding value to money for durable use as well as giving a personal touch. Doing it perfectly need you to gather a few essential materials, from the patch itself to the right tools. It begins from choosing right patch for hat. Once you’ve chosen a patch that suits your style and fits your hat, you’ll want to prepare the surface to ensure a smooth application. But the real challenge lies in the stitching process, where precision is key to achieving a clean, professional look. Let’s explore the steps that can make or break your patching endeavor.

Grabbing Required Stuff

Before you start sewing a patch on your hat, you’ll need to gather your materials. First, grab the patch you want to attach. Make sure it’s the right size and design for your hat.

Next, you’ll need a needle and thread; choose a color that complements your patch. If you prefer, you can use fabric glue for a quicker option, but sewing ensures durability.

Don’t forget scissors to trim any excess thread once you’re done. A thimble can protect your fingers if you’re sewing through thick fabric.

Finally, find a flat surface to work on, ensuring you have good lighting to see your stitches clearly. With everything in place, you’re ready to start sewing!

Pick the Right Patch

Selecting the right patch can make all the difference in how your hat looks and feels. Start by considering the style and purpose of your hat. Do you want a fun, quirky design or something more subtle and classic? Look for patches that reflect your personality and interests.

Next, think about size and placement; a patch that’s too large may overwhelm the hat, while a tiny one might get lost. Also, pay attention to the material—embroidered patches add texture, while printed ones offer vibrant colors.

Make sure the patch’s backing is suitable for sewing; woven or twill patches are generally easier to work with. Ultimately, choose a patch that resonates with you and complements your hat’s design.

Ensure Your Hat Is Ready

Preparing your hat is a crucial step to ensure the patch adheres properly and looks great. Start by selecting a clean, dry hat, free from dirt or oil. If your hat has any existing embellishments or decorations, consider removing them to create a smooth surface for the patch.

Next, decide on the patch’s placement; hold it against the hat to visualize how it’ll look. Once you’re happy with the position, mark the spot lightly with a fabric chalk or pencil.

If your hat is made of delicate materials, use a pressing cloth to protect it when ironing, if necessary, to flatten any wrinkles. This preparation lays the groundwork for a professional-looking patch application.

Sewing the Patch Onto Hat

  1. With the patch in place, you’re ready to sew it on. Thread your needle with a sturdy thread that matches the patch or hat color. Tie a knot at the end of your thread.
  2. Start from the inside of the hat, pushing the needle up through the fabric near the edge of the patch. Pull the thread tight, then insert the needle back down through the fabric, creating a small stitch.
  3. Continue this process, making even stitches around the patch’s perimeter. Aim for a distance of about 1/8 inch between each stitch for a consistent look.
  4. If you encounter any bulk in the fabric, adjust your stitching as needed. Keep sewing until you’ve secured the patch completely.

Finishing Touches

Once you’ve secured the patch, it’s time to add the finishing touches that will enhance its appearance.

Start by trimming any excess thread around the edges to give it a clean look. If the patch has any loose threads, carefully snip them away for a polished finish.

Next, consider adding a fabric stiffener or spray to help the patch hold its shape over time. If your hat allows, you might also want to iron it gently on a low setting to smooth out any wrinkles.

Finally, check the overall alignment and ensure the patch is securely attached.

Can I Iron on a Patch Instead of Sewing It?

Yes, you can iron on a patch instead of sewing it. It’s a quick and easy method that saves you time. Just make sure the fabric is heat-resistant, and follow the patch’s instructions. 

What Type of Thread Is Best for Sewing Patches?

For sewing patches, you’ll want to use a strong, durable thread like polyester or nylon. At Patches Mania, we use viscose, which is most durable thread for embroidery.

Can I Sew a Patch on a Leather Hat?

Yes, you can sew a patch on a leather hat. Just make sure to use a leather needle and thread, and be gentle to avoid damaging the material while ensuring the patch adheres securely.

How Do I Clean a Hat After Sewing on a Patch?

After sewing on a patch, you can clean your hat by gently spot-cleaning it with a damp cloth and mild soap. Avoid soaking it, and let it air dry to maintain its shape and integrity.

5 Reasons Glow-in-Dark Patches Are Essential for Nighttime Safety

Glow-in-the-dark patches are vital for nighttime safety because they greatly enhance visibility in dark conditions, reducing the risk of accidents. These patches absorb and store light, releasing a soft glow that helps you, your children, or pets remain seen during nighttime activities. Whether biking, walking home, or enjoying outdoor events, these visual cues are important for guiding safely and alerting others, including drivers. By applying these patches to clothing or gear, you’re taking a proactive step to guarantee everyone’s safety. Before getting started on this, let’s talk about why being visible in the dark is important first of all.

Visibility Importance at Night

Visibility technology has come a long way, offering various solutions to enhance your safety after sunset. Reflective gear, for example, can make you stand out, allowing drivers and pedestrians to notice you from a distance. However, reflective materials only work when light shines on them. This is where glow-in-the-dark options can play a significant role, providing a constant source of visibility, even in complete darkness.

Consider your choices carefully. Wearing bright colors or utilizing visibility technology can save lives. Whether you’re walking, biking, or engaging in outdoor activities, making sure you’re visible can help prevent unwanted hits.

Here are 5 useful reasons for glow-in-dark custom patches.

Secure Outdoor Activities

When you’re out nighttime hiking or camping, visibility can become a real concern. Glow-in-the-dark patches help you stay safe by making your gear easily identifiable in low light. Whether it’s your backpack, tent, or clothing, these patches guarantee that you can quickly locate your items, preventing unnecessary delays and potential accidents.

These patches serve as a visual cue, helping you navigate in the dark without relying solely on flashlights, which can drain batteries or attract unwanted attention. Imagine setting up your camping gear or finding your way back to your tent without fumbling around in the dark. With glow-in-the-dark patches, you enhance your overall experience by boosting your comfort level.

Enhancing Safety for Cyclists

For cyclists traversing dark streets or dimly lit paths, glow-in-the-dark emblems and patches can greatly enhance safety. These patches not only provide visibility but also complement your reflective gear, making you more noticeable to drivers and pedestrians. When you prioritize safety, consider the following bike accessories:

  1. Helmet Patches: Adding glow-in-the-dark patches to your helmet increases your visibility from all angles, ensuring you’re seen even in low-light conditions. For helmet use, we recommend Pvc stitch on patches.
  2. Bike Frame Strips: Apply patches to your bike frame for additional illumination. They act as a beacon, alerting others to your presence while you ride.
  3. Clothing Enhancements: Integrating glow-in-the-dark patches into your cycling apparel enhances your silhouette, making it easier for others to spot you.

Best Patch Type for Emergency Situations

Glow-in-the-dark patches not only enhance visibility but can also play a crucial role in emergency situations. Imagine traversing through a dark environment where every second counts; these patches can guide you safely. They’re not just decorative; they’re indispensable tools for emergency preparedness, especially during nighttime navigation.

Consider these real-life success stories:

Situation

Outcome

Lost hiker in the woods

Rescued quickly after using patches to signal location.

Car accident at night

First responders spotted reflective patches on vehicles, aiding in quick assistance.

Fire evacuation in a building

Occupants followed glow-in-the-dark markers to exit safely.

Outdoor concert emergency

Attendees used patches to find each other in the chaos.

Child lost in a park

Parents easily located their child wearing a glowing patch.

Kid’s Favorite for Safety Adventures

Adventure awaits when kids wear glow-in-the-dark patches during their outdoor escapades. These patches not only add a fun element but also greatly enhance safety during nighttime activities, such as playground exploration and night games. Imagine this: a group of children gleefully running around after sunset, their patches glowing brightly, making them visible to each other and to adults nearby.

Here are three real-life success stories that highlight the importance of glow-in-the-dark patches:

  1. A Midnight Treasure Hunt: During a neighborhood scavenger hunt, kids wearing glow-in-the-dark patches were easily spotted in the dark. Parents felt more secure watching their glowing silhouettes darting around, ensuring everyone stayed safe.
  2. Playground Patrol: At a local park, children adorned with these patches continued their games after dusk. The patches allowed adults to monitor them from a distance, promoting a safer environment for play.
  3. Safety First: During a community night game, a child tripped and fell. Thanks to their glowing patch, the supervising adults quickly spotted and assisted them, preventing any serious injury.

Emphasizing visibility is essential for ensuring safe adventures, especially when the sun goes down.

Sew-On Glowing Patches on Pet Harness & Collars

For pets, integrating glow-in-the-dark patches into dog accessories—like collars or harnesses—can be just as essential. Dogs and cats can dart away unexpectedly, and these patches serve as a visual cue, helping you locate them quickly. When your pet wears a glowing accessory, it not only adds a layer of safety but also gives peace of mind.

Now that I have covered 5 big reasons; let’s explore how these patches actually glow and considerable things for buying quality glow in dark custom patches.

How Glow-in-the-Dark Patches Work

Glow-in-the-dark patches harness the power of phosphorescent materials to provide a reliable source of visibility in low-light conditions. These patches absorb light during the day or under artificial lighting, storing it for later use. When darkness falls, they release this stored energy gradually, glowing softly to guide you through the night. Understanding how these materials work can enhance your safety.

Here’s a brief overview of the process:

  1. Light Absorption: Phosphorescent materials absorb light energy from various sources. The more light they absorb, the brighter they’ll glow later.
  2. Energy Storage: After absorbing light, these materials store energy in their atomic structure. This storage can last for hours, depending on the quality of the material and the intensity of the light source.
  3. Gradual Release: When the light source is removed, the patches slowly release the stored energy, emitting a soft glow that can be seen in the dark.

 Things To Consider Choosing Right Patches

Choosing the right glow-in-the-dark patches can greatly enhance safety during nighttime activities. When selecting patches, it is crucial to take into account both the patch materials and design considerations. The right choices can make a significant difference in visibility and durability.

  1. Material Quality: Look for patches made from high-quality, durable materials. Fabrics like nylon or polyester often work well, as they withstand wear and tear while maintaining their glow.
  2. Brightness and Duration: Assess how brightly the patches glow and how long they retain their luminescence after exposure to light. Some patches might glow brightly initially but fade quickly, which can be a safety risk.
  3. Attachment Method: Take into account how the patches will be attached. Sewn-on patches tend to be more secure, while adhesive options may peel off over time. Confirm that the attachment method suits your intended application and environment.

How Reflective Patches Enhance Safety in Outdoor Gear

Reflective patches enhance safety in outdoor gear by increasing visibility in low-light conditions, minimizing accident risks, and aiding in emergency response. These patches utilize light reflection technology, such as micro prisms and retroreflective films, to guarantee wearers are visible from several hundred meters away. Their placement on outdoor gear like jackets, helmets, and backpacks is essential for maximizing visibility, especially during activities such as cycling or climbing. Let’s explore in detail how strategic positioning, maintenance, and knowing when to replace these patches guarantee durability and continued effectiveness.

Importance of Visibility in Outdoor Activities

Visibility plays an essential role in ensuring safety during outdoor activities, where environmental conditions can often be unpredictable and challenging. Whether starting on nighttime adventures or traversing rugged terrain in low light, the ability to see and be seen is vital in accident prevention. Natural environments can obscure vision with changing weather, dense foliage, or sudden shifts from daylight to darkness. These factors greatly heighten the risk of accidents, making visibility a paramount concern.

In addition, ensuring high visibility during outdoor activities not only aids in the prevention of accidents but also facilitates quicker response times in emergencies, allowing for better communication and coordination with others. Reflective customized patches or other visibility-enhancing gear become essential in these settings, providing a simple yet effective means to improve visibility.

Types of Reflective Custom Patches

Reflective patches, with their significant safety benefits, are available in various types to suit different outdoor needs and preferences. Luckily, they are fully customizable in terms of font, style, size, and working environment. Among the most popular options are sew-on patches, which offer durability and permanence and are ideal for gear that requires frequent washing. Adhesive patches provide flexibility and ease of application, allowing users to attach them quickly without needing sewing skills.

Iron-on patches offer a balance between sew-on and adhesive, requiring only a heat source to affix them securely. Custom designs are available for those seeking personalized options, catering to specific branding needs. Glow in the dark patches adds an extra layer of visibility, emitting light even without an external source. Check my latest blog on adhesive backing options and check the table below for a quick understanding.

Type

Feature

Sew on patches

Durable and permanent

Adhesive patches

Easy to apply

Iron on patches

Heat-activated bonding


How Reflective Patches Work

Reflective patches are made from special materials that bounce back light towards its source, making the wearer more visible to others, such as drivers on a dimly lit road. Understanding how reflective patches work is fundamental to appreciating their role in safety. The table below outlines the basic components involved:

Component

Description

Function

Microprisms

Tiny prisms embedded in the patch

Redirect light back to its source

Retroreflective film

Material covering the microprisms

Enhances light bouncing efficiency

Adhesive backing

Sticky layer for attaching to gear

Guarantees secure attachment to various surfaces

Microprisms are vital, as they are designed to maximize the angle of light reflection. The retroreflective film further amplifies this effect, allowing visibility from several hundred meters away. The adhesive backing guarantees these patches remain securely attached to garment, maintaining effectiveness over time.

Target Placement for Adding Reflective Patches

The use of reflective materials can notably increase visibility in low-light conditions, which is vital for hikers, cyclists, and runners. When considering clothing or gear suitable for customization with reflective patches, items such as backpacks, jackets, and helmets are at the forefront. These gear pieces are typically made from durable fabrics that can securely accommodate reflective patches without compromising their structural integrity.

Backpacks, for instance, often have ample surface area, making them ideal for adding reflective materials in multiple locations. Jackets, especially those designed for outdoor use, come equipped with reinforced stitching that can support the weight and attachment of patches. Helmets, a key safety component for cyclists and climbers, benefit greatly from added visibility provided by reflective patches, ensuring wearers are seen from various angles.

It’s also critical to reflect on the height at which the patches are placed. Align patches at eye level of drivers for maximum visibility in traffic. Moreover, avoid placing reflective patches on areas that may be obstructed by gear or clothing layers, as this could reduce their effectiveness. By applying these placement strategies, outdoor enthusiasts can greatly enhance their safety and visibility, making their adventures not only enjoyable but also secure.

How Reflective Patches Can Long Run

Regular cleaning is essential. Use mild soap and a soft cloth to clean the surface gently. Avoid abrasive materials that could scratch or damage the reflective coating. Additionally, refrain from using harsh chemicals or bleach, as these can degrade the material and reduce visibility.

Consider the following table for a quick reference on caring for reflective patches:

Aspect

Recommended Practice

Cautionary Notes

Cleaning

Mild soap, soft cloth

Avoid abrasive materials

Drying

Air dry only

No direct heat sources

Storage

Store flat, avoid folding

Prevent creases and wrinkles

Inspection

Regularly check for wear or damage

Replace if visibility is low

Proper handling and storage also play a role in patch durability. Store patches flat to avoid creases, which can impede reflectivity.

Integrating Style With Safety

The evolving landscape of fashion trends is reshaping how outdoor enthusiasts select their attire, driving a demand for wearings that are both protective and aesthetically pleasing. Reflective patches serve as a key element in merging outdoor aesthetics with safety features, providing visibility without compromising on style.

Here are four ways in which style and safety are cohesively integrated into outdoor gear:

  1. Color Coordination: Reflective patches now come in various colors, allowing them to blend seamlessly with the garment, maintaining the overall aesthetic without sacrificing visibility.
  2. Design Innovation: Incorporating reflective elements into unique designs, such as geometric patterns or logos, enhances the visual appeal while serving the primary function of safety.
  3. Material Choices: Advanced reflective materials offer a sleek finish, catering to modern fashion trends while ensuring durability and effectiveness in low-light conditions.
  4. Customization Options: Personalized reflective patches allow consumers to express individuality, adding a personal touch to gear that is both fashionable and functional.

Do Reflective Patches Affect the Breathability of Outdoor Gear?

Reflective patches may raise breathability concerns in outdoor gear due to the material impact, potentially obstructing airflow.

Can Reflective Patches Be Customized With Logos or Designs?

Reflective patches can indeed be customized with logos or designs, providing custom design options that enhance branding benefits.


7 Advantages of Magnetic Backed Custom Patches & Pins

Magnetic patches provide an efficient, user-friendly approach to securely attaching objects without requiring specialized tools or expertise. Their ability to adhere seamlessly to pair-on clothing and hats makes them invaluable across custom patch families. Beyond functionality, metal pins and patches offer aesthetic benefits by enabling customized designs free from visible fasteners, promoting a clean and polished look.

5 Big Advantages Of Magnetic Backed Custom Patches

  • Magnetic backing provide effortless installation with no specialized tools required.
  • They offer secure attachment to metal surfaces, ensuring objects remain in place.
  • The intuitive design allows for easy customization and modifications of products.
  • Their durability reduces the likelihood of detachment under normal conditions.
  • Magnetic patches are eco-friendly and contribute to reduced environmental impact.


1.  Innovative Design Potential

Design flexibility is a key advantage of magnetic patches and pins. They provide a wider artistic approach and tap the ability to experiment with form and function. They allow for creative applications in various fields, such as fashion clothing and promotional hats. Designers can explore new avenues of expression and utility, making certain that products are not only useful but also visually engaging.

2. Effortless Attachment Process

The effortless attachment process of magnetic patches revolutionizes how objects can be secured with minimal effort. This process is defined by its magnetic alignment capabilities, which guarantee a seamless and precise connection between surfaces. Unlike traditional fastening methods that require tools or adhesives, magnetic patches offer a user-friendly installation experience. The simplicity of these patches lies in their intuitive design, which allows users to achieve a secure attachment without specialized knowledge or equipment.

3. Enhancing Overall Beauty

Magnetic pins allow for precise color coordination, ensuring that products maintain a cohesive and attractive look. By aligning with the overall design palette, magnetic pins, and patches can be tailored to complement and enhance the visual identity of target placement. This attention to detail not only satisfies aesthetic desires but also strengthens the product’s market appeal.

4. Providing Wider Branding

Branding opportunities are greatly amplified by integrating magnetic patches into products. Companies can utilize these patches to display logos, slogans, or other branding elements without compromising the product’s design. The ease of attachment and detachment provided by magnetic patches allows for dynamic branding, enabling businesses to update or modify their visual identity as needed.

5. Offering Clean & Sleek Looks

Magnetic pins facilitate a clean and polished finish, eliminating the need for visible seams or fasteners that could detract from the product’s appearance. This method enhances the overall user experience, combining practicality with an elegant and modern design.

6. Reducing Environmental Impact

By integrating magnetic custom patches and pins into the apparel market, companies can greatly reduce environmental impact. Utilizing magnetic patches allows traditional patch manufacturers to opt for eco-friendly materials, which greatly contribute to sustainability benefits. Traditional patch-making methods often involve waste-level fabric waster, threading, chemical backing, and adhesive material that is used for short-lived peel-and-stick patches. In contrast, magnetic patches offer a cleaner alternative, reducing the need for these potentially harmful substances.

7. Reusability and Longevity

As companies endeavor to reduce their environmental impact, the focus naturally extends to the reusability and long-lasting of custom patches. Magnetic patches exemplify this shift by incorporating durable materials that withstand repeated use. These materials guarantee longevity, reducing the frequency with which replacements are needed, thereby minimizing waste.

How Strong Is the Magnetic Hold Under Extreme Weather Conditions?

The magnetic strength of patches remains robust under extreme weather conditions, demonstrating notable weather resistance. These patches are engineered to maintain their hold despite temperature fluctuations, moisture, and wind, ensuring reliable performance in diverse environmental scenarios.

What Are the Cost Implications Compared to Traditional Attachment Methods?

The cost implications of magnetic patches compared to traditional attachment methods include initial higher expenses. However, they offer significant cost savings over time as a long-term investment.

9 Creative Ideas to Apply Custom Patches to Apparel

Custom patches offer endless possibilities for personal expression. Vintage patchwork or embroidery enlivens the design on jackets, while strategic placement on hats can create stunning visual contrasts. Sneakers transform with creatively positioned patches on the heel, while denim can be upcycled with themed patches. Bags become unique with focal patch clusters, and Velcro hook offers easy interchangeability.

This is just the beginning; let’s discover creative ideas about patches that can rebrand stuff around you.

Fashionable Jacket Enrichment

Upgrading jackets into fashionable ornament has become a prominent trend. It offers a unique way to personalize outerwear. Among the most popular enhancements are vintage patchwork and embroidered designs, which allow individuals to express their personal style while adding a touch of nostalgia and artistic flair to their garments. Vintage patchwork involves the careful selection and arrangement of fabric pieces, often sourced from older textiles, to create a visually appealing mosaic on the jacket’s surface. This method not only showcases individuality but also promotes sustainability by repurposing materials that might otherwise go to waste.

Embroidered designs, on the other hand, involve intricate stitchwork to form patterns or images on the jacket. These designs can range from simple motifs to elaborate scenes, offering endless possibilities for customization. Embroidery adds texture and depth to the jacket, making it stand out in a crowd.

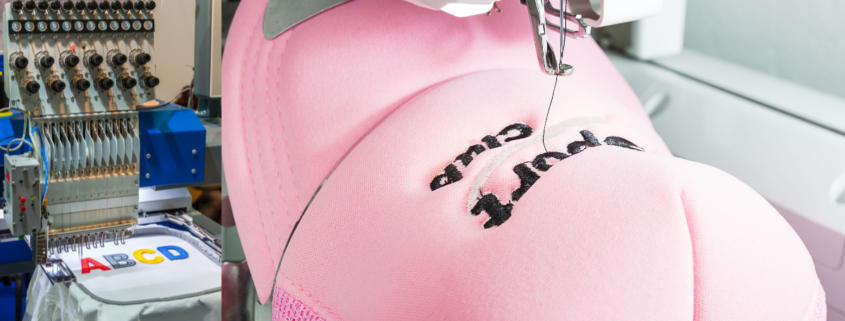
Transforming Hats With Patches

Patches have become a versatile tool for transforming hats into unique fashion statements. The strategic use of patch placement and color combinations can turn ordinary headwear into eye-catching hats that reflect personal style. Custom patches offer endless possibilities for creativity, allowing individuals to make bold statements or subtle enhancements to their headwear. Understanding how to apply patches to hats effectively involves several considerations.

Sneaker Customization Ideas

Sneaker customization with patches is an exciting and creative way to express individuality while elevating the aesthetic appeal of footwear. By focusing on unique sneaker colorways and strategic patch placement, you can transform a standard pair of sneakers into a personalized statement piece.

Shoe patches are usually made of two types of custom patches: soft rubber PVC or embroidered. PVC is more valued due to its sturdy material and waterproof feature. While embroidery patches can not be heat-pressed on sneakers, stitching is recommended.

What Colors Are Recommended for Sneaker Patches?

Selecting the right colorway is essential; it can harmonize or contrast with the patches used, thereby influencing the overall visual impact. Bold, vibrant colors can make patches stand out, while subtler hues may create a cohesive look.

What Is the Best Patch Placement on Sneakers?

Patch placement requires thoughtful consideration to maintain balance and design integrity. It is important to choose areas on the sneaker that will not only enhance its appearance but also endure wear and tear. Common locations include the heel, tongue, and sides, where patches can accentuate the shoe’s natural lines. However, it is crucial to verify that patches do not interfere with the sneaker’s functionality or comfort.

  • It is advisable to use high-quality patches that can withstand regular use and washing.
  • Considering the sneaker’s material is significant, as some surfaces may require special adhesives or sewing techniques to guarantee patches remain securely attached.

Upcycling Denim With Creativity

While sneaker customization offers a canvas for personal expression, upcycling denim presents a unique opportunity to breathe new life into worn-out garments. This process promotes sustainability by reducing waste. Patches are used to fix ripped clothing; another effective method is the use of custom patches to enhance the appeal of denim items. Here are four creative ways to incorporate denim patchwork and embroidered designs into your upcycling projects:

  1. Patchwork Revival: Combine different denim pieces to create a patchwork design on jackets or jeans. This not only covers worn areas but adds a trendy, artistic flair.
  2. Embroidered Accents: Use embroidered designs to accentuate pockets or seams. This technique allows you to infuse personal style while reinforcing parts of the garment that experience significant wear.
  3. Themed Creations: Choose a theme, such as floral or geometric patterns, and apply patches accordingly. This cohesive approach can transform an ordinary piece into a statement garment.
  4. Strategic Placement: Place patches over stains or tears to disguise imperfections. This method extends the life of your denim while adding a layer of individuality.

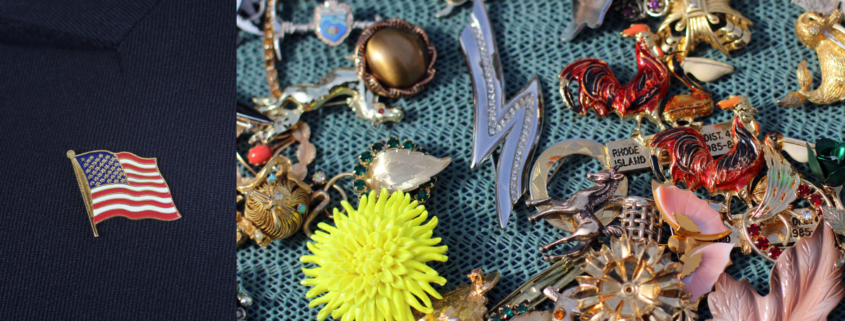
Bag Personalization Techniques

Another great way to learn about custom patches is by upgrading accessories to the next level. Innovative bag personalization techniques can blend the functionality and style of bags. This is a great idea to transform your old antique bags into unique expressions of personal taste. However, strategic patch placement is key to achieving great results.

One effective strategy is to focus on symmetry. By placing patches evenly on both sides of a tote, for instance, you create a balanced look. Another approach is to apply patches to areas prone to wear and tear, thereby reinforcing the material while adding visual interest. Clustering patches in one area, such as the bottom corner or the flap, can create a focal point that draws attention. Here is a quick review of the technique and its benefits.

Technique

Description

Benefits

Symmetrical Design

Evenly placing patches on both sides of the bag

Creates visual balance

Reinforcement Spots

Applying patches on high-wear areas

Increases durability

Focal Clusters

Grouping patches in specific areas

Draws attention to design details

I would highly recommend using aesthetic patches for this purpose. That way, you can make ordinary bags look brand-new.

Versatile Velcro Attachments

An idea of multiple usage is Velcro custom patches. This patch backing type allows for easy patch placement and removal, catering to fashion enthusiasts who desire flexibility. Understanding velcro system is essential for ideal results. When selecting velcro for patches, consider the following factors:

  1. Patch Sizes: Choose velcro that matches the dimensions of your patches to guarantee secure attachment and prevent edges from peeling.

It is recommended to cover the entire backing of the patch with a Velcro hook for longer connectivity and a perfect pair.

  1. Textile Compatibility: Verify the velcro hook is suitable for the fabric of the apparel to maintain garment integrity and avoid damage.

Soft backers like polyester for woven and dye-sublimated patches need extra care to sew Velcro attachments.

  1. Color Coordination: Select velcro that complements the patch and garment colors to maintain a cohesive appearance.

Usually, Velcro pair is available in black and white pairs. To match the patch color palettes, you can get a Velcro set dyed in the required colors.

Unique Sleeve Decorations

Incorporating unique sleeve decorations into apparel can greatly enhance a garment’s visual appeal. This idea will get your warm arms expressing personal flair. By strategically using sleeve graphics and thoughtful patch placement, clothing can transform from ordinary to extraordinary. Sleeve decorations serve artistic touch, enabling wearers to convey messages or showcase affiliations directly on their attire.

Things To Consider Before Patching the Sleeves

When considering patch placement on sleeves, it is important to evaluate the garment’s design and fabric. The placement should complement the piece without overwhelming it. For instance, a single, bold patch can serve as a statement on a plain sleeve, while multiple smaller patches might create a dynamic pattern on a more subdued background. It is essential to maintain balance and harmony in design to guarantee the garment remains visually appealing.

Selecting the right sleeve graphics is also significant. Consider the theme or message you wish to express, and choose graphics that align with that vision. Whether opting for embroidered motifs or printed designs, the graphics should be to withstand wear.

Artistic Patch Layering

Artistic patch layering frequently is a sophisticated, approachable idea to enhancing apparel with depth and texture. By strategically utilizing patch placement and texture combinations, individuals can create visually appealing designs that stand out. To achieve the desired effect, consider the following tips:

  1. Experiment with Patch Sizes: Using a variety of patch sizes can create a dynamic look. Larger patches can serve as focal points, while smaller ones add detail and intricacy.
  2. Play with Texture Combinations: Mixing different textures, such as embroidered and woven patches, will add a tactile element to your apparel, making it more engaging to the touch and visually interesting.
  3. Layer Colors Thoughtfully: Choose complementary or contrasting colors for your patches to enhance their visual impact. Layering similar shades can create a subtle gradient, while bold contrasts can make each patch pop.
  4. Consider Patch Placement: Strategic placement is key to successful layering. Avoid overcrowding by spacing patches appropriately, allowing each one to be appreciated individually while contributing to the overall design.

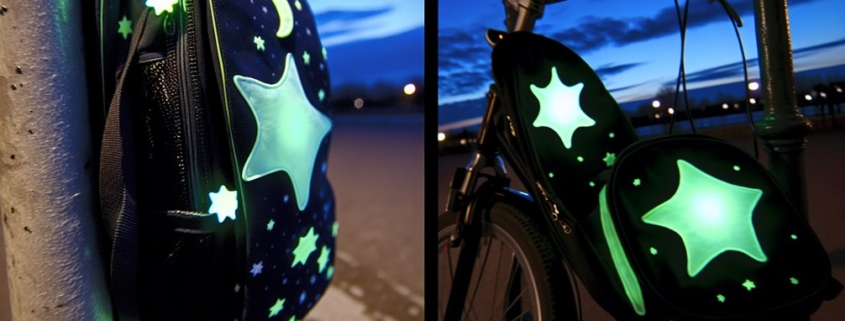
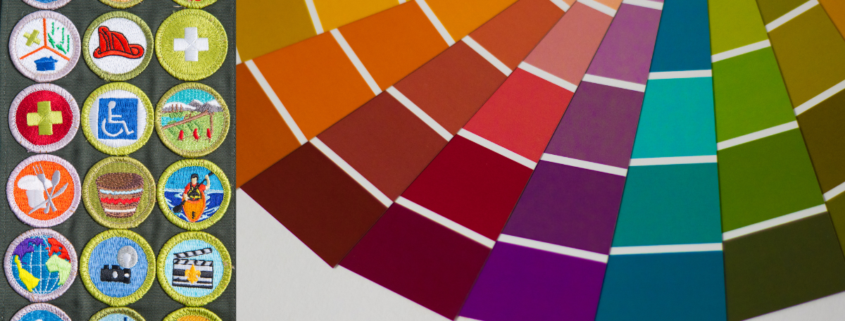
Seasonal Patch Themes

Building on the creative potential of artistic patch layering, seasonal patch themes offer an opportunity to align apparel with the changing seasons, adding a thematic flair to garments. Utilizing holiday motifs and seasonal colors allows clothing to not only reflect personal style but also celebrate the distinctiveness of each season. For instance, autumnal patches might feature rich oranges, deep reds, and golden yellows, capturing the essence of falling leaves. Winter themes could embrace cool blues and silvers, with designs like snowflakes or festive holiday symbols.

However, when selecting patches for seasonal themes, it is essential to guarantee that the chosen colors complement the base fabric of the apparel. The harmony between the patch and the garment guarantees that the overall look remains cohesive. Additionally, attention should be paid to the application technique, as improper attachment could lead to premature wear or damage.

You have infinite ways to use custom patches to decorate clothing and accessories. By considering these quick ideas, you can successfully incorporate patches, creating a wardrobe that is both dynamic and reflective over time.

How to Create a Perfect Color Palette for Custom Patches

Creating the perfect color palette for custom patches begins with a solid grasp of color theory and its emotional impact. Start by defining the purpose and audience of your patch to align colors with the intended message. Consider psychological and cultural connotations and utilize digital tools to experiment with hues and test combinations. Also, accounting for fabric limitations and documented selections with precise color codes will aid in achieving consistent results.

Let’s explore further to uncover techniques for impeccable patch design.

Quick Overview

  • Understand the emotional impact and cultural significance of colors to align with your patch’s message and audience.
  • Define your patch’s purpose and target audience to guide color choices and ensure emotional resonance.
  • Balance current color trends with timeless hues for a modern yet enduring palette.
  • Use digital tools to experiment with color combinations and test their effectiveness through feedback and mock-ups.
  • Consider fabric limitations to ensure chosen colors remain vibrant and compatible with embroidery techniques.

Understanding Color Theory

Understanding color theory is vital for creating an effective color palette for custom patches. At the core are primary colors—red, blue, and yellow—serving as the foundation from which all other colors derive. Mastery of color harmony involves blending these hues to achieve a visually pleasing effect, often invoking an emotional impact that resonates with viewers. For instance, red might evoke passion or urgency, while blue often conveys calmness. This emotional impact is further influenced by cultural significance, as colors can carry different meanings across societies.

Color Psychology

Color psychology plays a key role in selecting hues that align with the intended message of a patch. It involves understanding how colors affect perception and behaviour, guaranteeing the palette chosen supports the patch’s purpose. Contrast techniques, such as pairing complementary colors, enhance legibility and focus, while saturation levels dictate vibrancy and subtlety. Remaining informed about current color trends guarantees that the design remains modern and appealing.

Incorporating these elements into the design process requires a delicate balance, yet it is essential to achieving a coherent and impactful custom patch. The thoughtful application of color theory transforms a simple design into a powerful communication tool.

Defining Patch Purpose

The initial step in creating a custom patch is to clearly define its purpose, as this serves as the foundation for all subsequent design decisions. Understanding the purpose guides guarantees that the patch effectively communicates the intended message. Patch symbolism plays a pivotal role in conveying meaning and connecting with the target audience. Whether the patch represents an organization, commemorates an event, or showcases personal identity, the symbolism must be considered with care.

Key Role of the Patch

To begin, identify the core message or theme you wish to express. Consider the patch’s role: Is it to promote unity, celebrate an achievement, or perhaps raise awareness? Each purpose necessitates different visual elements and symbols to resonate with the intended audience. For instance, a patch designed for a youth group may emphasize vibrant colors and playful motifs, whereas a military unit patch might focus on discipline and heritage.

Choosing a Color Scheme

Color is a powerful tool in the design of custom patches, serving as both an aesthetic element and a communicator of the patch’s purpose. Selecting a color scheme requires a thoughtful approach, as the hues chosen can evoke specific emotions and convey messages. Understanding color psychology is vital; for instance, blue often symbolizes trust and calmness, while red can represent passion or urgency. These associations can greatly impact how your patch is perceived and should align with its intended message or function.

Seasonal Trends

Seasonal trends also play a significant role in choosing a color scheme. Colors that are popular during certain times of the year can enhance the relevance and appeal of your patch. For example, warm tones like oranges and browns are typically associated with autumn, while pastels are favored in spring. By incorporating these trends, your patch can remain current and visually engaging.

Consider the longevity of the colors you select, aiming for a harmonious blend that will stand the test of time while still resonating with the intended audience.

Using Digital Color Tools

Digital color tools offer designers an invaluable resource for crafting the perfect palette for custom patches. Utilizing these tools effectively can guarantee color harmony and branding consistency, essential aspects for any design. The color wheel is one such vital tool, helping designers understand relationships between colors and assisting in selecting complementary or analogous hues.

Digital Swatches

Digital swatches allow for easy experimentation with various shades, ensuring the chosen palette aligns with intended design themes and contrast levels. Luckily, Patches Mania offers its own digital file that we share with everyone joining our elite patch club. Our PDF file format helps you match the branding sheds of your logo to embroidering threads. Also, these hex codes afford the flexibility to tweak designs until the perfect balance is achieved while we are printing stickers, dye-sublimation or DTF transfers. Moreover, digital swatches aid designers in creating visually appealing and functional custom patches that communicate their message effectively.

To guarantee a cohesive and accessible design, consider the following:

  • Saturation adjustments: Modifying saturation levels can affect mood and visibility, making colors more vibrant or muted as needed.
  • Color accessibility: Evaluate how color combinations affect individuals with color vision deficiencies to enhance readability and inclusivity.
  • Branding consistency: Align colors with existing brand guidelines to maintain a unified identity across all platforms.

Considering Fabric Limitations

When designing custom patches, understanding fabric limitations is vital for guaranteeing the final product meets expectations. Different fabric types dictate the color palette choices due to their unique properties. For instance, twill and felt offer different texture influences, with twill allowing for sharper detail and felt providing a softer appearance. These textures affect how colors are perceived and should be carefully considered.

Colourfastness

Colourfastness considerations are important as well. Some fabrics may not hold dye as well as others, leading to fading over time. This directly impacts patch durability, particularly if the patches are exposed to sunlight or frequent washing. Understanding dye limitations can help in selecting colors that maintain their vibrancy.

Embroidering Compatibility

Embroidery compatibility is another factor influenced by fabric type. Heavier material weights, such as those found in denim or canvas, may limit the intricacy of designs that can be effectively embroidered. Conversely, lighter fabrics might not support the weight of a dense embroidery design, affecting the patch’s longevity.

Testing Color Combinations

When testing color combinations, consider the contrast balance to guarantee that your design is both eye-catching and legible. High contrast can make elements pop, but too much might feel overwhelming. Conversely, low contrast can make a design appear muted or hard to discern.

To effectively test color combinations, consider these strategies:

  • Create digital mock-ups: Use design software to preview how different colors interact before committing to a final choice.
  • Print samples: Testing on fabric can reveal how colors behave in real-world conditions, exposing any issues with contrast or vibrancy.
  • Seek feedback: Gather opinions from others to evaluate how well your chosen colors communicate the intended message.

Finalizing Color Palette

When finalizing your palette, consider the emotional impact that colors can evoke. Each hue carries its own psychological weight and can influence perceptions and emotions. For instance, blues often evoke calmness and trust, while reds may inspire energy and urgency. Understanding these associations allows you to choose colors that align with the intended message and purpose of your patch.

Light Test

It is essential to test your chosen palette under different lighting conditions and materials to ascertain its versatility and effectiveness. This step helps anticipate how colors will appear in real-world applications. By taking a thoughtful approach to finalize your color palette, you can create a patch that communicates the desired message effectively.