Custom logos for branding, re-branding, start-ups and businesses. Best color use, elements and simplicity.

Tips for Perfect Color Matching in Custom Logos for Patches

When you’re designing custom logos for patches, getting your color matching just right can make a significant difference. This basic step will ultimately determine how your brand is perceived. Understanding color theory and selecting a palette that matches the theme idea of a custom logo is key. Utilizing the right tools and testing your colors in various lighting conditions plays a crucial role, too. Curious about how to integrate these elements seamlessly into your design process? Let’s explore some practical strategies that can simplify this task.

Understanding Color Theory

When it comes to creating a custom logo, grasping the basics of color theory can really help you nail down the perfect palette. Understanding how colors interact is key.

For instance, complementary colors, positioned opposite each other on the color wheel, create striking contrasts that grab attention. On the other hand, analogous colors, which sit next to each other, produce harmony and a cohesive look.

You’ll also want to consider color temperature; warm colors can evoke energy and excitement, while cool colors often convey calm and trust.

Don’t forget about saturation and brightness, as they can significantly influence the overall feel of your logo. By mastering these elements, you’ll be well-equipped to craft a logo that resonates with your audience.

Choosing the Right Color Palette – 3-Step Theory

Choosing the right color palette for a customized logo can make all the difference in how your brand is perceived.

Step #1 – Brand Persona

Start by considering your brand’s personality. Are you aiming for something bold and energetic or calm and professional?

Step #2 – Target Audience

Colors evoke emotions, so choose hues that resonate with them. Limit your palette to two to four main colors to maintain clarity and coherence.

Step #3 – Shed Harmony

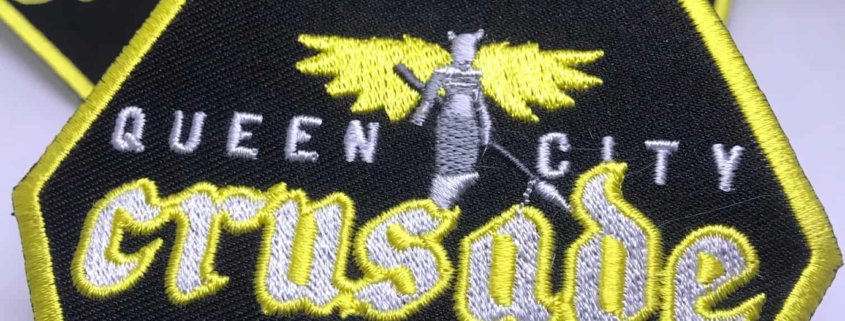
It’s crucial to ensure your colors work well together, creating harmony rather than chaos. Test different combinations and visualize how they’ll look in various applications, like on patches.

Finally, keep in mind the colors’ meanings and cultural significance, as they can impact how your brand is interpreted.

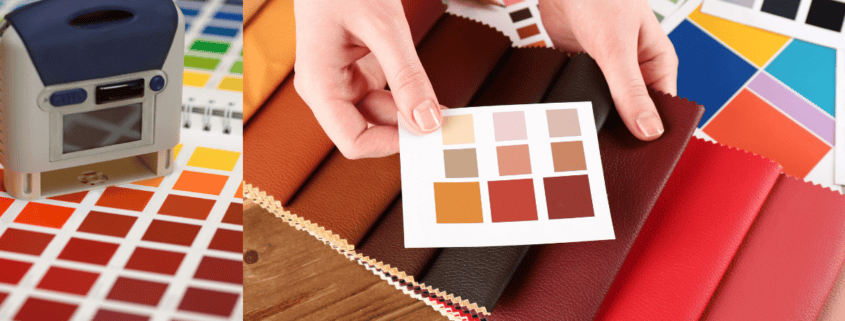
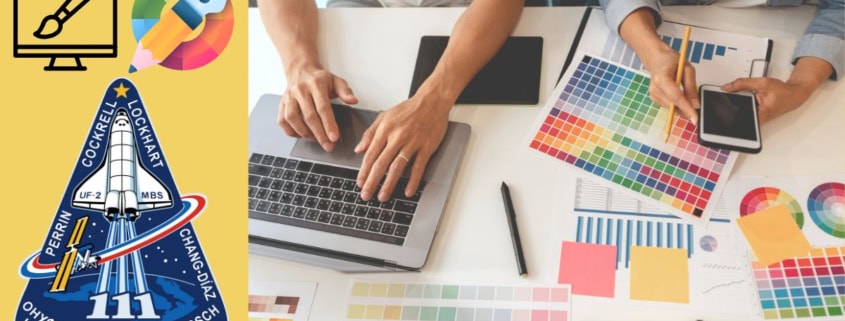
Utilizing Color Matching Tools

Color matching tools are essential for ensuring your custom logo’s colors look great across different mediums. These tools, like color swatches, digital color pickers, and Pantone guides, help you select and match colors accurately.

When you use a color wheel, you can find complementary colors that enhance your design. Additionally, software like Adobe Illustrator offers built-in color-matching features, allowing you to see how your colors will appear on-screen and in print.

Don’t forget to keep a color reference library handy so you can maintain consistency across various projects. By utilizing these tools, you’ll achieve the perfect color harmony that elevates your custom logo and ensures it stands out in any application.

Testing Colors in Different Lighting

Testing your logo’s colors in various lighting conditions is crucial for ensuring they look their best in any environment. Different light sources, like natural sunlight and fluorescent and incandescent bulbs, can dramatically change how colors appear.

To get a true sense of your logo’s colors, examine them in these different settings. Take your sample patches outside to see how they hold up under daylight, then check them under indoor lighting.

Don’t forget to consider the time of day, as natural light can shift throughout the day. Keep a color reference guide handy to compare the patches in each lighting scenario.

Incorporating Brand Identity

Aligning it with your brand identity is essential for effective communication. Your logo should reflect your brand’s values, mission, and personality.

Start by identifying the core elements of your brand: what makes it unique? Use these insights to guide your color choices, shapes, and typography. For example, if your brand promotes sustainability, earthy tones, and organic shapes can convey that message effectively.

Ensure your logo is versatile enough to work across different mediums while maintaining its integrity. Don’t forget to test how your color palette resonates with your target audience; their perception can shape your brand identity.

Ultimately, a well-crafted logo will serve as a powerful visual representation of who you are.

Why You Need Vector Files for Custom Patch Design

When designing for custom patches, you might not realize how crucial vector files are to your project’s success. Unlike raster images, vectors maintain their quality no matter how much you scale them. A vectorized version of the image for patchwork ensures any intricate design stays sharp. Plus, vectorization of logos for patches offers versatility, allowing for quick edits, and gives freedom to experiment with colors and shapes effortlessly.

But the advantages of vector files compared to raster for a custom patch does not stop here. Let’s understand how a regular-sized image for patch work follows designing processes step by step.

Understanding Raster Vs Vector Files

I will explain keynotes and the differences between each type one by one.

Raster Images

We have to understand the vector file properly before we can move forward.

Any regular image in your mobile device or laptop is, most of the time, low-resolution/pixels. Hence, it cannot be printed directly. It is also referred to as bitmap images and called raster images. This version is recommended for sharing purposes.

Nature

A raster image is made up of a grid of individual pixels. Each pixel carries color information, and together, they form the complete image.

Quality

When you zoom in on a raster image, you’ll notice that it becomes pixelated, losing its smooth appearance. This characteristic limits how much you can enlarge these images without sacrificing quality.

Use

Raster images are commonly used in photography, digital art, and web graphics. Formats like JPEG, and GIF are popular examples.

Size

Because they rely on resolution, the size of a raster image determines its detail level. When working with these images, it’s essential to consider their intended use to ensure they meet your quality requirements.

Vectorized Images

Nature

An expert designer uses mathematical formulas to define shapes, lines, and colors pf vector image

Quality

This means that they can be scaled infinitely without losing quality, making them ideal for logos, illustrations, and other designs that require flexibility.

Use

You will often find vector graphics in digital design, print media, and animations because of their versatility and precision.

Size

When you edit a vector image, you’re manipulating points and paths rather than pixels, allowing for smoother adjustments and cleaner results.

How Scalability Is Important For Creating Custom Patches

This scalability is vital for patches that may be displayed in various sizes. When you design with vector files, you’re ensuring that every detail remains sharp and clear, no matter how large or small the final product is.

What Are Common Formats for Printing Patches

Common formats like SVG, AI, and EPS are widely used in the patch industry. Familiarizing yourself with these formats will help you communicate effectively with designers and manufacturers.

Why Should You Know the Difference

Ultimately, grasping the concept of vector files will empower you to create stunning, professional-quality custom patches that stand out.

Advantages Vectorized Images Over Raster Images

Vector files offer significant advantages over raster images, especially for custom patch design.

First, vectors are resolution-independent, meaning you can scale them to any size without losing quality. This flexibility allows you to create patches in various dimensions, from small badges to large back patches, without worrying about pixelation.

Additionally, vector files are easily editable, so you can adjust colors, shapes, and elements effortlessly. This adaptability makes it simple to refine your design to match your vision.

Furthermore, vector graphics typically have smaller file sizes compared to raster images, which streamlines storage and sharing.

Ultimately, using vector files ensures your custom patches look professional and polished, enhancing the overall impact of your designs while providing you with creative freedom.

Whereas the quality of custom patches printed with raster images is compromising. Why would you take a risk for just not doing it vector while you are already spending much more on buying customized patches?

Unique Benefits of Vectorization for Printing Patches

Buy More; Pay Less: Creating custom patches with vector files not only ensures high-quality designs but also boosts cost-effectiveness in production. When you use vector files, you’re working with scalable graphics that don’t lose quality, meaning you can produce patches in various sizes without additional costs.

Keep Doing Re-dos: This flexibility allows you to adapt designs for different projects without starting from scratch, saving both time and resources.

System Friendly: Additionally, vector files streamline the production process. They’re easily compatible with embroidery machines and printing equipment, reducing setup time and minimizing waste.

Once for all: Fewer revisions and adjustments lower your overall production costs. By investing in vector files, you enhance your design capabilities while keeping expenses in check, making your custom patch projects not only creative but also budget-friendly.

Frequently Asked Questions

Can I Convert Raster Images to Vector Files Easily?

You can convert raster images to vector files, but it isn’t always easy. Software like Adobe Illustrator can help, yet results vary based on image complexity. With Patches Mania, you can now take advantage of the first design-free offer.  

What Software Is Best for Creating Vector Files?

To create vector files, you’ll find Adobe Illustrator, CorelDRAW, and Inkscape among the best software options.

Are Vector Files Compatible With All Printing Methods?

Vector files are highly compatible with most printing methods, but not all. You should always check the specific requirements of your printing process to ensure that the vector format works seamlessly for your project. Talk to Team Patches Mania for more information.

Can I Edit Vector Files After They Are Created?

Yes, you can edit vector files after they’re created. With vector graphics software, you can easily adjust colors, shapes, and sizes without losing quality. Just open the file, make your changes, and save it!